Technical guide
Beverage development guide
From the first recipe to a packaged sample, with detailed steps and equipment for 22 types of drinks.
The contents list links to the steps, equipment and sample tests for each type of drink.
Beverage development starts with a small batch and a plan for what to test. This guide organizes the equipment by where you need it in a lab-to-pilot research and development (R&D) workflow. Start with lab batches, then plan pilot trials before moving to a production line. Use pilot systems to test recipes, find which processing settings work, compare packages and study shelf life before investing in production equipment. The equipment includes UHT/HTST (ultra-high-temperature treatment and high-temperature, short-time pasteurization) units, homogenizers, deaerators, aseptic fillers, carbonator-fillers, and falling-film or forced-circulation evaporators.
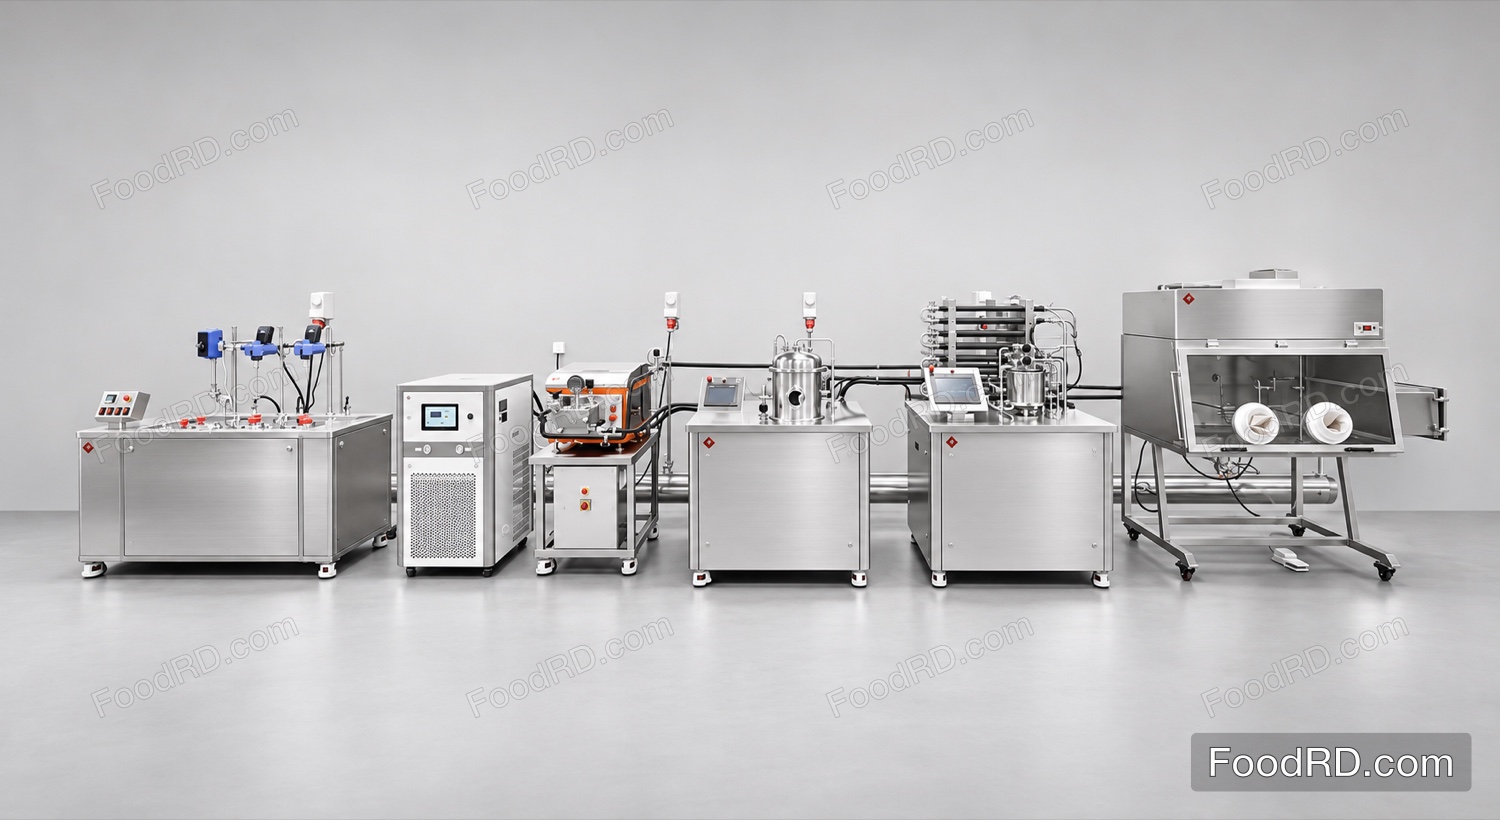
Beverage R&D Workflow Overview
- Drink concept → The initial brief covers who the drink is for, any product claims, the balance of sweetness and acidity, and protein or fiber targets.
- Small lab batches → Small batches in beakers show how well the solids dissolve. Lab measurements cover pH (a measure of how acidic the drink is), °Brix (a measure of dissolved solids, mainly sugars in many drinks), and viscosity (how thick the liquid is).
- Pilot tests → A pilot run can compare UHT/HTST settings, homogenization (breaking up droplets or particles to keep the drink evenly mixed) pressures and stages, vacuum deaeration (removing dissolved gases), hold times, and cooling profiles.
- Aseptic filling and carbonation (aseptic filling means putting treated drinks into pre-sterilized packages under controlled conditions) → Packaging trials can use PET (polyethylene terephthalate, a type of packaging plastic), HDPE (high-density polyethylene, a type of packaging plastic), or glass bottles and aseptic aluminum foil bags. These trials check the headspace (the space above the liquid in the package) and any O₂ pickup (oxygen entering the drink during processing or filling).
- Stability and shelf life → Both accelerated and real-time storage tests track taste, texture, separation, color, and Nutrient Retention.
- Moving to production → The move to a production line involves carrying over process settings, validating CIP/SIP (cleaning and sterilizing equipment in place) cycles and estimating costs.
Lab Formulation & Bench Tests
What happens in the lab: Lab preparation starts with wetting and dissolving solids. Hydrocolloids (ingredients used to thicken or stabilize a drink) absorb water. The recipe sets the pH and acidity. A buffer system helps keep the pH steady. Sugar and other sweeteners set the sweetness. Lab batches also show how the recipe affects the drink’s first aromas, color and mineral balance. They help show whether dairy or plant proteins stay evenly dispersed.
Lab equipment: Precision scales, high-shear mixer, magnetic stirrer, pH and °Brix meters, Brookfield viscometer, benchtop lab homogenizer, and an optional micro-pasteurizer.
Lab records: These include the master recipe, the batch record, the ingredient certificates of analysis (CoAs), and the tasting panel’s first notes.
Pilot Process Validation: UHT/HTST, Homogenization, Deaeration
Controlled trials on Pilot Plants help identify the settings that work for a drink.
- UHT/HTST: Trials on tubular, plate, or DSI (direct steam injection) modules help set target heating temperatures, hold times, temperature changes (ΔT), and outlet temperatures.
- Homogenization: The guide describes 1- or 2-stage setups and example test pressures of 80–200 bar for dairy or 200–600 bar for plant-based and juice emulsions. Settings depend on the product.
- Vacuum deaeration: Removing dissolved O₂ helps protect flavor, color, and vitamins and prepares the beverage for carbonation.
- Cooling & back-pressure: These settings help prevent sudden boiling as pressure drops and keep aromas in the liquid.
Aseptic Filling, Carbonation & Packaging Validation
- Aseptic filling: Trial packages include PET, HDPE, or glass bottles and aseptic aluminum foil bags. Aseptic checks include media-fill runs (filling tests using a growth medium to check for contamination) and checks that the filters are intact.
- Carbonation trials: A Pilot carbonator-filler can test whether the setup reaches the target CO₂ volumes and controls headspace O₂.
- Package checks: These cover whether substances move between the drink and the package, how well the package blocks O₂ and holds CO₂, how tight the caps are, and whether the seams are sound.
- Labels and cases: Trials can check how labels handle condensation on chilled drinks and how efficiently each pack format fits into cases.
Sensory, Stability & Shelf-Life Program
-
- Sensory: In a triangle test, tasters try to pick the different sample. Quantitative Descriptive Analysis (QDA) scores specific sensory traits. Central Location Tests (CLTs) gather feedback from consumers at a test site.
- Physical: Checks cover layers forming, fat or droplets rising (creaming), solids settling (sediment index), and changes in thickness over time.
- Chemical: Measurements track pH, color (Lab*), how much of the vitamins and active ingredients remains, and markers of Maillard browning.
- Microbes: Standard plate counts and microbial challenge tests are used when product claims require them.
- Shelf-life: Shelf-life studies combine accelerated storage (e.g., 37–45 °C) with real-time storage. Time-temperature indicators track temperature exposure for products that stay cold during storage and transport.
Data, Compliance & Scale-Up Rules
- Trial records: The records include batch details, CIP/SIP logs, PLC readings over time, validation reports, bills of materials (BOMs), and cost totals.
- Compliance: Production planning covers allergen controls, label requirements, evidence for nutrient claims, and applicable HACCP, ISO, FDA and EFSA requirements or guidance.
- Checks when moving to production: Engineers compare the Reynolds number (Re), time the product spends in the equipment (residence time), and heat-transfer coefficients to keep these conditions consistent. They also check that homogenization uses the same energy per amount of product and that heat has an equivalent effect on microbes. F-value expresses that effect as an equivalent time at a set temperature. Pasteurization units (PU) describe the cumulative effect of heat. Engineers check the hold-tube geometry whenever flow rates change.
Equipment & Systems — Complete Coverage
Water Treatment Equipment
R&D Use: Bench or pilot RO+UV/UF (reverse osmosis, ultraviolet light, ultrafiltration) skid to supply consistent base water for every trial.
Industrial Use: Multi-barrier treatment lines (RO/EDI/UV/UF) with mineral dosing to match the target water profile.
Key Specs: Permeate flow rate, conductivity/TDS (total dissolved solids), UV dose, and UF membrane cut-off.
Selection Tips: Include a bypass line for mineral-dosing trials and data ports to log TDS and flow.
Raw Material Processing & Mixing System
R&D Use: Lab high-shear mixer, Water Bath Blending Vessel for mixing or fermentation (2-50L), jacketed tanks (50–100 L), and an inline mixer to dose syrups, acids, and flavor top-notes.
Industrial Use: Syrup preparation, batch and inline blending, powder addition, and CIP.
Key Specs: Shear rate, tank turnover time, heating/cooling jacket capacity, and powder induction rate.
Selection Tips: Include ports for pH, °Brix, and viscosity probes, plus a variable frequency drive (VFD) to test different shear rates during design-of-experiments (DOE) runs.
Homogenizer
R&D Use: 1–2-stage lab or pilot homogenizer (80–600 bar) to stabilize protein and plant-based emulsions.
Industrial Use: 5–60 k L/h production units with aseptic configurations.
Key Specs: Maximum pressure, two-stage pressure ratio, product heat rise, and CIP/SIP compatibility.
Selection Tips: For plant-based drinks, plan test sweeps across 200–400 bar and include a heat-exchanger bypass.
Pasteurization Equipment(HTST/UHT/DSI)
R&D Use: Pilot tubular, plate, or DSI unit with interchangeable hold-tubes (e.g., 135–152 °C, 1–8 s).
Industrial Use: Production lines with 70–90% heat regeneration and automated PU or F-value control.
Key Specs: Lethality control, pressure drop (ΔP), heat regeneration efficiency, product ΔT, and fouling detection.
Carbonation Equipment
R&D Use: Pilot isobaric (pressure-balanced to help retain carbonation) carbonator-filler (2.0–3.5 vol CO₂).
Industrial Use: Integrated deaeration and carbonation blending systems with automatic CO₂ trim.
Key Specs: CO₂ dosing precision, O₂ pickup, filling temperature, and CIP capability.
Filling Machine
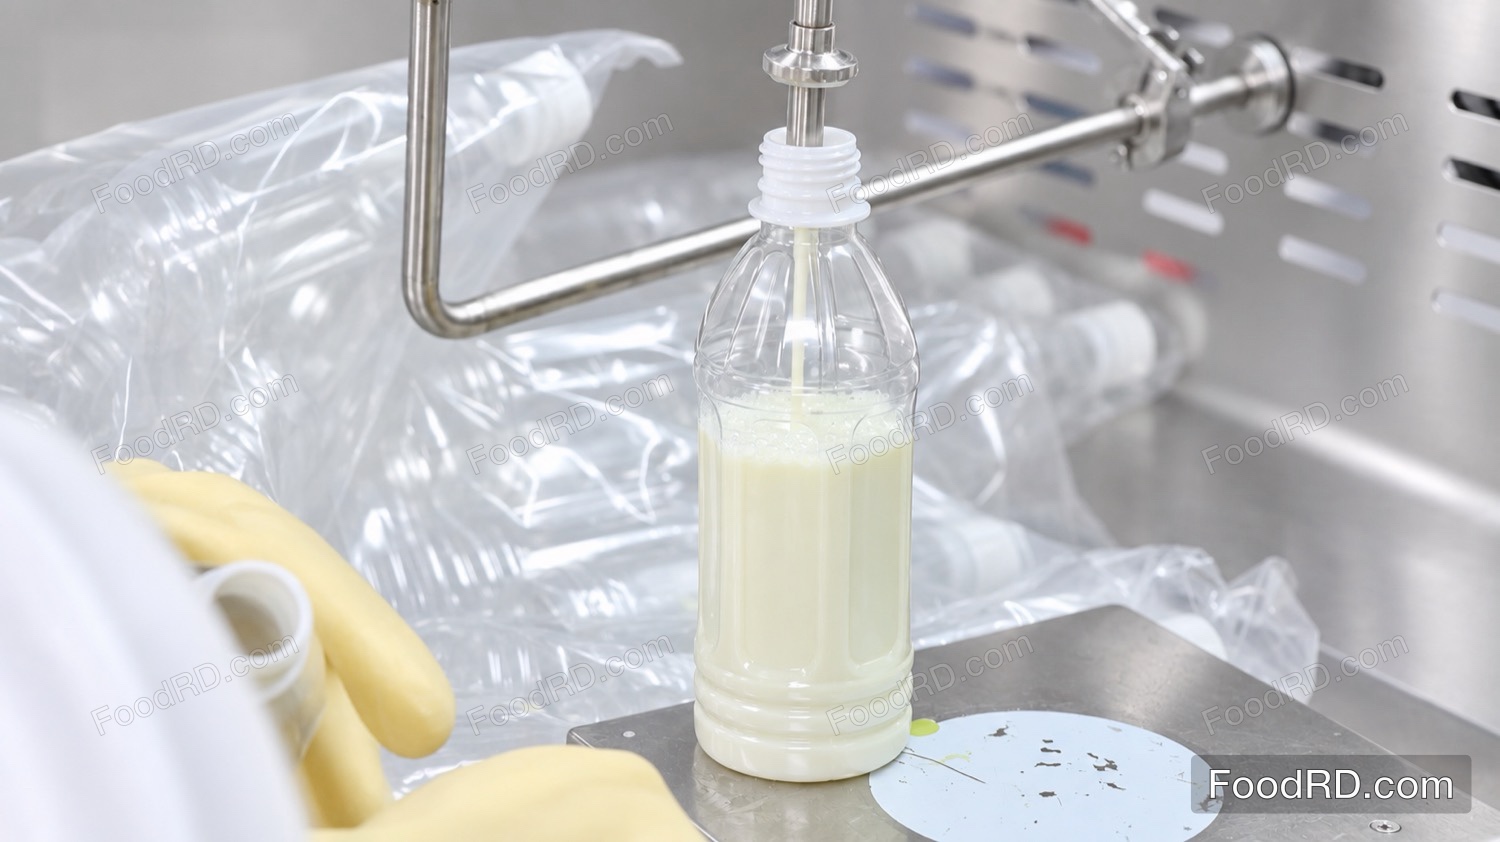
R&D Use: Aseptic filling cabinet for PET, HDPE, or glass bottles and aseptic aluminum foil bags, paired with an isobaric filler for sparkling drinks.
Industrial Use: Aseptic, isobaric, gravity, or piston fillers (for drinks with particulates).
Key Specs: Container format range, changeover time, O₂ pickup, and CIP/SIP capability.
Sealing Machine
R&D Use: Benchtop capper and can seamer with torque testing for quality assurance (QA).
Industrial Use: Multi-head cappers and high-speed seamers.
Key Specs: Torque range, seam profile dimensions, and cap liner compatibility.
Labeling Machine
R&D Use: Semi-automatic pressure-sensitive labeler and shrink-sleeve applicator for commercial-grade mockups.
Industrial Use: High-speed pressure-sensitive (PS), shrink-sleeve, or hot-glue labeling lines.
Key Specs: Placement accuracy (registration) and adhesion on wet surfaces.
Packaging Machine
R&D Use: Benchtop shrink wrapper and small carton packer for pilot batches.
Industrial Use: Shrink wrappers, wrap-around cartoners, and case packers/sealers.
Key Specs: SKU flexibility, changeover speed, and film or case board specifications.
Steam Generator
R&D Use: Compact electric steam generator to heat HTST, UHT, and CIP loops.
Industrial Use: Gas or biomass boilers and clean steam for direct steam injection (DSI).
Key Specs: Steam quality, pressure stability, and a clean-steam option.
Air Compressor
R&D Use: Oil-free air compressor to drive valves and actuators, fitted with a sterile air filter for aseptic zones.
Industrial Use: Screw compressors paired with dryers and filtration.
Key Specs: Free air delivery rate, pressure dew point, and residual oil carryover.
Cooling System
R&D Use: Process chiller to hold 0–2 °C during carbonation and rapidly cool product after UHT treatment.
Industrial Use: Central glycol chillers and factory cooling towers.
Key Specs: Cooling capacity (kW), approach temperature, and coefficient of performance (COP).
X-Ray Foreign Body Detector
R&D Use: Batch quality control (QC) checks on pilot runs and validation of new packaging formats.
Industrial Use: 100% inline inspection of sealed packages.
Key Specs: Minimum detection threshold (mm), maximum line speed, and false-reject rate.
Mass Analyzer(Checkweigher)
R&D Use: Check fill weight accuracy and product giveaway during short pilot runs.
Industrial Use: Checkweighers that weigh moving packages and reject out-of-range packs.
Key Specs: Weighing accuracy at target line speed and reliable package ejection.
Automated Warehouse System(AS/RS)
R&D Use: Use a small barcode-tracked staging area for pilot batches.
Industrial Use: Automated storage and retrieval systems (AS/RS) for raw materials and finished goods, enforcing first-in, first-out (FIFO) rotation and full lot traceability.
Key Specs: Throughput, warehouse management system (WMS) integration, and temperature-controlled zones.
Conveyor Belt System
R&D Use: Short sanitary conveyors linking the mixer→filler→packer.
Industrial Use: Full plant conveyor network with space for packs to queue between machines.
Key Specs: FDA-compliant belt material, ease of cleaning, and accumulation control logic.
Wastewater Treatment System
R&D Use: Compact physical-chemical treatment skid for pH neutralization and removal of oils and suspended solids (SS).
Industrial Use: Primary, secondary, and tertiary treatment plants with options to reuse water.
Key Specs: Tolerance for variable inflow, chemical and biochemical oxygen demand (COD/BOD) load, and sludge handling capacity.
Pilot-Scale Process Details for Different Beverage Categories
Still Juice (Non-Carbonated) | Pilot-Scale Validation Guide
1️⃣ Raw Juice / Concentrate Preparation →
2️⃣ Enzyme Treatment (optional) →
Steps 3–4. Filtration, Blending & Deaeration (order depends on the recipe and equipment) →
5️⃣ Pasteurization (85–95 °C / 15–60 s) or UHT (121–140 °C / 2–7 s) →
6️⃣ Aseptic or Hot Filling →
7️⃣ Storage Stability Validation
Step 1. Raw Juice / Concentrate Preparation
Pilot Module
Laboratory extractor or reconstitution tank with temperature control and gentle agitation. An automatic water-bath blending vessel is an option for sample mixing.
Flow & Objective
Press fresh fruit or dilute concentrate to the target °Brix to make the juice base.
This sets the baseline flavor, pH, and soluble solids for pilot blending trials.
Step 2. Enzyme Treatment (Optional)
Pilot Module
Jacketed enzyme tank with temperature control (45–55 °C) and pH adjustment.
Flow & Objective
Add pectinase or cellulase to make cloudy juices clearer and easier to filter.
Pilot runs find the best enzyme dose and holding time for the target viscosity and clarity.
Step 3. Filtration & Blending
Pilot Module
Inline filter (1–5 µm) with a dosing system for controlled blending and pH control.
Flow & Objective
Filter out coarse pulp or sediment, then balance sweetness and acidity to match the formula.
Pilot runs compare mouthfeel and stability at different pulp levels and acid ratios.
Step 4. Deaeration
Pilot Module
Vacuum deaerator to protect product quality.
Flow & Objective
Remove dissolved oxygen under vacuum.
This helps limit oxidation and keeps the batch evenly mixed before heating.
Step 5. Thermal Treatment (UHT or Pasteurization)
Pilot Module
Flexible thermal processing unit that runs both indirect UHT (121–140 °C / 2–7 s) and pasteurization (85–95 °C / 15–60 s).
Flow & Objective
Choose and validate a heating method based on acidity, pulp level, packaging, and storage needs.
Pilot validation finds the best PU level and flavor retention curve for each recipe.
Step 6. Aseptic or Hot Filling
Pilot Module
Aseptic filling cabinet with HEPA (high-efficiency particulate air) filtration, or a hot-fill station rated for 88–92 °C.
Flow & Objective
For shelf-stable juices, fill UHT-treated liquid under aseptic air or hot-fill conditions based on the container type.
Pilot trials check for container warping, seal integrity, and headspace oxygen.
Step 7. Storage Stability Validation
Pilot Module
Controlled-environment chamber for accelerated aging and real-time shelf-life tests.
Flow & Objective
Store finished juice at 25–37 °C for accelerated trials or at room temperature for real-time studies.
Track pH, color, sediment, and sensory quality over 3–6 months to assess stability and whether the package works for the juice.
Pilot Targets:
- Archived pH trial range: 3.0–4.2. Validate the thermal process for the specific product.
- Transmittance ≥ 90 % for clear juice; creaming < 10 % (30 days) for cloudy juice.
- Vitamin C retention ≥ 85 % after processing.
- Color change ΔE < 2.0 (ΔE is a measure of color difference) after 90 days @ 25 °C.
- No visible sediment or flavor drift.
Dairy / Plant-Based (Protein Systems) | Pilot-Scale Validation Guide
Overall Pilot Process Flow
1️⃣ Raw Material Hydration / Soaking →
2️⃣ Grinding & Extraction →
3️⃣ Enzyme-Assisted Treatment (optional) →
4️⃣ Filtration / Separation →
5️⃣ Two-Stage Homogenization (200–250 / 50 bar) →
6️⃣ Thermal Processing (HTST / UHT) →
7️⃣ Aseptic Filling →
8️⃣ Stability Observation & Shelf-Life Evaluation
Step 1. Hydration / Soaking
Pilot Module
Soaking tank or hydration reactor with temperature control (25–35 °C) and gentle agitation. An automatic water-bath blending vessel is an option for sample mixing.
Flow & Objective
Soak soybeans, almonds, oats, or pea protein concentrates in temperature-controlled water for 4–12 hours.
This softens plant cell walls, loosens heavy fibers, and creates an even slurry for grinding.
Step 2. Grinding & Extraction
Pilot Module
Wet grinder, colloid mill, or high-shear extractor that produces fine suspensions.
Flow & Objective
Grind the soaked raw material into an even slurry while keeping the temperature below 55 °C to limit unwanted changes to the proteins.
Pilot trials track extraction yield, viscosity, and initial particle size.
Step 3. Enzyme-Assisted Treatment (Optional)
Pilot Module
Enzyme reactor with temperature and pH control that runs in batch or continuous mode. An automatic water-bath blending vessel is an option for sample mixing.
Flow & Objective
Add protease, cellulase, or hemicellulase at 45–55 °C to help proteins dissolve and reduce off-flavors.
Pilot runs find the best enzyme ratio and hold time for high extraction yield and a clean taste.
Step 4. Filtration / Separation
Pilot Module
Vibrating sieve (100–150 µm) paired with a decanter centrifuge or microfiltration system (1–5 µm).
Flow & Objective
Remove coarse fiber and insoluble solids to leave a smooth liquid base.
This improves mouthfeel and reduces the risk of solids clogging the homogenizer and UHT unit downstream.
Step 5. Two-Stage Homogenization
Pilot Module
Two-stage homogenizer with adjustable pressure (50–250 bar). The first stage breaks down particles, and the second stabilizes the emulsion.
Flow & Objective
Homogenize the filtered protein base at 200/50 or 250/50 bar to keep oil, water, and protein evenly mixed in the protein base.
Pilot runs measure droplet size reduction, viscosity changes, and emulsion stability during cooling.
Step 6. Thermal Processing (HTST / UHT)
Pilot Module
Thermal unit that runs both HTST (85–95 °C / 15–30 s) and UHT (135–145 °C / 2–4 s) modes, with PU and flow monitoring.
Flow & Objective
Match the heat treatment to the product's pH and protein type:
For acidic drinks, consider HTST. For neutral protein drinks, the archived route uses UHT to target commercial sterility. Validate the complete process and package.
Pilot runs check heat stability, flavor retention, and any tendency to separate.
Step 7. Aseptic Filling
Pilot Module
Aseptic filler with HEPA-filtered air and automatic sealing under ISO Class 5 conditions.
Flow & Objective
Fill the heated protein drink into sterile bottles or pouches under aseptic air to prevent recontamination.
Pilot tests monitor headspace oxygen and assess the controls used to maintain sterility before long-term storage.
Step 8. Stability & Shelf-Life Evaluation
Pilot Module
Controlled-environment chamber and rheometer for long-term physical and microbial testing.
Flow & Objective
Store pilot batches at room temperature or accelerated temperatures to watch for sediment, separation, and pH drift.
Measure viscosity shifts and protein solubility over 30–90 days to refine the formula.
Pilot Targets:
- Protein 2.5–3.5 %, fat 1.5–3.0 %, pH 6.6–6.8 for heat stability.
- Two-stage homogenization at 180/40 bar; viscosity 20–40 mPa·s @ 50 s⁻¹.
- No curdling or separation after 30 days @ 25 °C.
- Flavor retention ≥ 85 %; color change ΔE < 2.0 (90 days).
- Microbial load < 1 CFU/mL (colony-forming units per milliliter) post-UHT (138 °C / 3 s).
ESL Milk / Flavored Milk (HTST → Cold Chain) | Pilot-Scale Validation Guide
Overall Pilot Process Flow
1️⃣ Raw Milk Reception ↓
2️⃣ Fat/SNF Standardization ↓
3️⃣ Two-Stage Homogenization (150/50 bar) ↓
4️⃣ HTST Pasteurization (72–78 °C / 15–30 s) ↓
5️⃣ Rapid Cooling (2–4 °C) ↓
6️⃣ Cold Filling under Laminar Flow ↓
7️⃣ Cold-Chain Storage Validation
Step 1. Standardization of Fat/SNF
Pilot Module
Laboratory mixing tank with temperature control and variable-speed agitation for 5–20 L pilot batches.
An automatic water-bath blending vessel is an option for sample mixing.
Flow & Objective
Adjust chilled raw milk to the target fat (1.5–3.5%) and solids-not-fat (SNF, 8.5–9.0%) ratios to keep viscosity and emulsion even.
This gives every pilot batch the same base composition before homogenization.
Step 2. Two-Stage Homogenization
Pilot Module
Two-stage laboratory homogenizer with adjustable pressure (50–200 bar) and temperature-controlled feed (60–70 °C).
Flow & Objective
Homogenize at 150/50 bar to shrink fat globules and keep them suspended.
Pilot tests show how pressure and shear affect droplet size and creaming over time.
Step 3. HTST Pasteurization (72–78 °C / 15–30 s)
Pilot Module
Laboratory HTST unit with a tubular or plate heat exchanger, validated holding tube, and pasteurization unit (PU) monitor.
Flow & Objective
Heat milk to 72–78 °C for 15–30 seconds to reduce microbes while protecting fresh flavor.
Pilot runs track how PU levels relate to microbial reduction and taste.
Step 4. Rapid Cooling & Cold Filling
Pilot Module
Tubular or plate heat exchanger with a glycol cooling loop (ΔT ≤ 1.5 °C) and a hygienic filling head under laminar airflow.
Flow & Objective
Cool pasteurized milk right away to 2–4 °C, then fill it into sterile containers under laminar airflow.
This step checks oxygen pickup and microbial protection during cold filling.
Step 5. Cold-Chain Storage Validation
Pilot Module
Temperature-controlled chamber for shelf-life testing and microbial checks.
Flow & Objective
Store packaged milk at 2–6 °C to match retail refrigeration.
Track pH, viscosity, and microbial counts over 30–60 days to assess how the extended shelf life (ESL) milk holds up.
Pilot Targets:
- pH 6.6–6.8, total solids 11–13 %, suited for HTST heating.
- Two-stage homogenization at 150/50 bar for a smooth texture.
- Archived HTST trial range of 72–78 °C / 15–30 s, evaluating against a microbial count target of <10³ CFU/mL.
- Rapid cooling to 2–4 °C; hold viscosity at 2–6 mPa·s.
- No creaming or sediment after 10 days of cold storage.
Shelf-Stable UHT Milk / Cocoa Milk (Aseptic) | Pilot-Scale Validation Guide
Overall Pilot Process Flow
1️⃣ Raw Milk Reception →
2️⃣ Standardization of Fat/SNF →
3️⃣ Ingredient Blending (Cocoa / Sugar / Stabilizer) →
4️⃣ Two-Stage Homogenization (200/50 bar) →
5️⃣ UHT Sterilization (137–145 °C / 2–4 s) →
6️⃣ Aseptic Filling (PET / Glass / Carton) →
7️⃣ Ambient Shelf-Life Monitoring
Step 1. Standardization of Fat/SNF
Pilot Module
Laboratory mixing tank with temperature control (40–50 °C) and variable-speed agitation.
Flow & Objective
Adjust raw milk to the target fat (2.5–3.5 %) and SNF (8.5–9.0 %) levels for balanced body and heat stability.
Keep the milk base uniform before adding cocoa or sugar so processing stays consistent from batch to batch.
Step 2. Ingredient Blending
Pilot Module
Heated blending tank with a high-shear mixer and powder-dispersion system. An automatic water-bath blending vessel is an option for sample mixing.
Flow & Objective
Disperse cocoa powder, sugar, and stabilizers at 60–70 °C to create a smooth suspension.
Pilot trials test mixing time, shear rate, and how evenly the cocoa mixes to see which settings reduce settling.
Step 3. Two-Stage Homogenization
Pilot Module
Two-stage homogenizer with adjustable pressure (100–250 bar) and inlet temperature control.
Flow & Objective
Homogenize at 200/50 bar to stabilize fat globules and spread cocoa particles evenly.
Pilot runs test how different pressures shrink droplets and hold particles in suspension.
Step 4. UHT Sterilization (137–145 °C / 2–4 s)
Pilot Module
Tubular, plate, or direct steam injection (DSI) UHT unit with a validated holding tube, flow-diversion valve, and PU recorder.
Flow & Objective
Heat the homogenized milk or cocoa mix at the archived pilot settings of 137–145 °C for 2–4 s. Commercial sterility requires validating the complete process and package together.
Pilot trials compare direct steam injection with indirect heating to see which keeps better flavor and color.
Step 5. Aseptic Filling
Pilot Module
Aseptic filling station with HEPA-filtered laminar airflow and automatic sealing under ISO Class 5 conditions.
Flow & Objective
Fill UHT-treated liquid into pre-sterilized containers under aseptic airflow to prevent recontamination.
Pilot runs assess the controls used to maintain sterility and check that headspace oxygen stays below 0.5 mg/L.
Step 6. Ambient Shelf-Life Monitoring
Pilot Module
Temperature-controlled stability chamber for long-term storage tests.
Flow & Objective
Store samples at 25–37 °C for 3–6 months to check for sediment, flavor loss, and color shifts.
Pilot data show how well the product holds up in storage and help refine the shelf-stable formula.
Pilot Targets:
- pH 6.6–6.8, total solids 12–14 %, for heat stability and balanced flavor.
- UHT at 138–142 °C / 2–4 s; cool to ≤25 °C after heating.
- Two-stage homogenization at 180/40 bar; viscosity 20–35 mPa·s.
- No protein curdling or sediment after 90 days @ 25 °C.
- Flavor and color retention ≥85 %, ΔE <2.0; microbial sterility maintained.
High-Protein RTD Dairy (Heat-Sensitive) | Pilot-Scale Validation Guide
Overall Pilot Process Flow
1️⃣ Ingredient Hydration & Pre-Mixing →
2️⃣ Enzyme / pH Conditioning →
3️⃣ Two-Stage Homogenization (180/50 bar) →
4️⃣ Gentle Heat Treatment (80–95 °C / 15–60 s or 125–135 °C / 1–3 s) →
5️⃣ Cooling →
6️⃣ Aseptic or Cold Filling →
7️⃣ Stability & Protein Behavior Evaluation
Step 1. Ingredient Hydration & Pre-Mixing
Pilot Module
Agitated hydration tank with temperature control (25–45 °C) and gentle circulation to prevent lumps. An automatic water-bath blending vessel is an option for sample mixing.
Flow & Objective
Disperse milk protein concentrate, whey protein isolate, and stabilizers in warm water until fully hydrated.
This gives the mix even hydration and steady viscosity before homogenization.
Step 2. Enzyme / pH Conditioning
Pilot Module
Jacketed enzyme reactor or conditioning tank with pH and temperature control. An automatic water-bath blending vessel is an option for sample mixing.
Flow & Objective
Use mild protease treatment or adjust pH (6.4–6.8) to help proteins handle heat without clumping.
Pilot trials compare enzyme doses and buffer systems to get the best solubility.
Step 3. Two-Stage Homogenization
Pilot Module
Two-stage homogenizer with adjustable pressure (150–200 bar) and feed temperature control (55–65 °C).
Flow & Objective
Homogenize the protein mix at 180/50 bar to shrink particles and stabilize the fat-protein emulsion.
Pilot runs check droplet evenness and see how viscosity responds to shear.
Step 4. Gentle Heat Treatment
Pilot Module
Compact HTST/UHT unit with exact holding-tube control and PU monitoring for heat-sensitive formulas.
Flow & Objective
Run gentle heating (80–95 °C for 15–60 s or 125–135 °C for 1–3 s) to compare microbial reduction and protein stability under these archived pilot conditions.
Pilot tests compare how each temperature and time combination affects the tendency to gel.
Step 5. Cooling
Pilot Module
Tubular or plate heat exchanger with a glycol cooling loop (ΔT ≤ 1.5 °C).
Flow & Objective
Cool the product quickly below 10 °C to limit protein clumping or separation after heating.
Pilot tests track particle size and solubility across the cooling curve.
Step 6. Aseptic or Cold Filling
Pilot Module
Laminar-flow aseptic filling cabinet or hygienic cold-fill station.
Flow & Objective
Fill the treated drink aseptically for shelf-stable formats, or fill it chilled for refrigerated lines.
Pilot runs compare oxygen pickup and microbial risk between the two filling methods.
Step 7. Stability & Protein Behavior Evaluation
Pilot Module
Rheometer and temperature-controlled storage chamber to track texture and internal structure.
Flow & Objective
Store pilot batches at 25–37 °C for 3–6 months to watch for gelling, sediment, and viscosity drift.
These results help teams fine-tune protein stabilizers and heating profiles.
Pilot Targets:
- Protein 6–10 %, total solids 12–16 %, pH 6.7–6.9 for stability.
- Preheat to 55–60 °C → Homogenize at 200/50 bar → UHT at 135–138 °C / 2 s.
- Viscosity 40–80 mPa·s @ 50 s⁻¹; no gelling after 30 days @ 25 °C.
- Flavor retention ≥80 %; no cooked or sulfur notes.
- Pilot microbial count target: <1 CFU/mL. Validate commercial sterility for the full process and package.
Hot-Fill Tea (Ambient) | Pilot-Scale Validation Guide
Overall Pilot Process Flow
1️⃣ Tea Extraction →
2️⃣ Filtration & Clarification →
3️⃣ Ingredient Blending (Sugar / Acid / Flavor) →
4️⃣ Deaeration →
5️⃣ Pasteurization (88–92 °C / 15–30 s)/UHT Sterilization (135–140 °C / 2–4 s) →
6️⃣ Hot Filling (85–90 °C) →
7️⃣ Cooling →
8️⃣ Ambient Shelf-Life Observation
Step 1. Tea Extraction
Pilot Module
Jacketed extraction tank with temperature control (80–90 °C) and adjustable steeping time.
Flow & Objective
Steep tea leaves or concentrates in hot water to draw out polyphenols and aroma compounds.
Pilot trials test different extraction temperatures and times to balance deep color against bitterness.
Step 2. Filtration & Clarification
Pilot Module
Coarse filter (50–100 µm) and fine filter (1–5 µm) with an optional system for adding clarifying aids.
Flow & Objective
Filter out suspended solids, tea dust, and leftover fibers to create a clear tea base.
This step improves visual clarity and prevents sediment from settling in the bottle during storage.
Step 3. Ingredient Blending
Pilot Module
Agitated blending tank with temperature control (70–80 °C) and a powder induction system. An automatic water-bath blending vessel is an option for sample mixing.
Flow & Objective
Mix and dissolve sugar, citric acid, and flavor compounds into the tea base.
Pilot trials check the balance of sweetness and acidity and measure how well flavors survive hot-fill temperatures.
Step 4. Deaeration
Pilot Module
Vacuum deaerator (100–200 mbar) built with a degassing chamber and an inline O₂ sensor.
Flow & Objective
Strip out dissolved oxygen to limit oxidation and changes in color.
Pilot trials find the right vacuum pressure and hold time to push dissolved oxygen below 0.5 mg/L.
Step 5. Pasteurization/UHT
Pilot Module
Plate or tubular pasteurizer with a validated holding tube and a PU recorder.
Flow & Objective
Heat the tea to 88–92 °C for 15–30 seconds or to 135–140 °C for 2–4 seconds to reduce microbial loads.
Pilot tests measure microbial reduction alongside changes in tea flavor and clarity.
Step 6. Hot Filling (85–90 °C)
Pilot Module
Hot-fill station with temperature-controlled filling heads and an automatic capper.
Flow & Objective
Fill the heat-treated tea straight into heat-resistant bottles at 85–90 °C and cap them right away.
Pilot checks confirm that the bottles hold their shape and the caps seal tightly under hot-fill heat.
Step 7. Cooling
Pilot Module
Water-bath or air-cooling conveyor with an adjustable cooling speed.
Flow & Objective
Cool the filled bottles step by step to below 35 °C so the internal vacuum does not warp the bottles.
Pilot operators track the cooling curve to see how cooling speed affects flavor and clarity.
Step 8. Ambient Shelf-Life Observation
Pilot Module
Temperature-controlled stability chamber for real-time storage testing.
Flow & Objective
Store samples at 25–37 °C for 3–6 months to track flavor fade, color shifts, and sediment.
The results help teams fine-tune antioxidant levels and pH buffers.
Pilot Targets:
- Tea extract solids: 0.3–0.6 %, pH 4.0–4.5, suited for hot-fill stability.
- Pasteurization: 90–92 °C / 30 s → Hot-fill ≥85 °C → Hold 30 s → Seal.
- Color change: ΔE <2.0 after 90 days @ 25 °C, with no sediment or haze.
- Aroma retention: ≥80 %, with no oxidation or off-flavors.
- Microbial count: <10 CFU/mL, with no bottle swelling or leaks after 14-day incubation.
Low-Cal RTD Tea (Aseptic) | Pilot-Scale Validation Guide
Overall Pilot Process Flow
1️⃣ Tea Extraction →
2️⃣ Filtration & Clarification →
3️⃣ Low-Cal Ingredient Blending (Sweetener / Acid / Flavor) →
4️⃣ Deaeration →
5️⃣ UHT Sterilization (135–140 °C / 2–4 s) →
6️⃣ Aseptic Filling →
7️⃣ Storage & Stability Observation
Step 1. Tea Extraction
Pilot Module
Jacketed extraction tank with temperature control (75–85 °C) and agitation for 10–20 min steeping cycles.
Flow & Objective
Steep tea leaves or tea essence at a controlled temperature to extract polyphenols without pulling out harsh astringency.
Pilot trials aim for steady color and repeatable catechin levels from batch to batch.
Step 2. Filtration & Clarification
Pilot Module
Two-stage filtration unit: an 80–100 µm pre-filter and a 1–3 µm fine filter, with optional PVPP clarification.
Flow & Objective
Remove undissolved particles and cloudiness to produce a bright tea base ready for UHT sterilization.
Pilot checks measure light transmittance and watch for sediment after heating.
Step 3. Low-Cal Ingredient Blending
Pilot Module
Heated mixing tank with a precision dosing pump for sweeteners and acids. An automatic water-bath blending vessel is an option for sample mixing.
Flow & Objective
Mix high-intensity sweeteners (such as sucralose and stevia) with acidity regulators and flavors at 60–70 °C.
Pilot trials check pH, flavor release, and perceived sweetness after UHT heating.
Step 4. Deaeration
Pilot Module
Vacuum deaerator (100–200 mbar) fitted with an inline O₂ sensor and a CO₂ trap.
Flow & Objective
Remove dissolved oxygen to limit browning and off-flavors caused by oxidation during UHT heating.
Target a final oxygen level below 0.5 mg/L to protect the drink on the shelf.
Step 5. UHT Sterilization (135–140 °C / 2–4 s)
Pilot Module
Indirect tubular UHT unit with a validated holding tube, a PU recorder, and an aseptic connection.
Flow & Objective
Heat the low-calorie tea at 135–140 °C for 2–4 seconds to test microbial reduction and flavor survival under the archived trial settings.
Pilot testing compares catechin breakdown and color stability across different PU levels.
Step 6. Aseptic Filling
Pilot Module
Aseptic filling cabinet with HEPA-filtered laminar airflow and an automatic capper.
Flow & Objective
Fill the heat-treated tea into pre-sterilized PET bottles, HDPE bottles, or laminated cartons inside an ISO Class 5 zone.
Pilot checks track headspace oxygen, microbial sterility, and cap seal quality.
Step 7. Storage & Stability Observation
Pilot Module
Controlled-environment chamber for long-term stability and sensory testing.
Flow & Objective
Store aseptic samples at 25–37 °C for 3–6 months to track color, sweetness, and flavor breakdown.
Pilot findings show how much antioxidant and chelator the formula needs.
Pilot Targets:
- Total solids: 1.0–2.5 %, pH 4.2–4.6, suited for aseptic UHT processing.
- UHT settings: 135–138 °C / 3 s; fill temperature ≤25 °C (aseptic).
- Sweetener system: sucralose + acesulfame-K (80–100 ppm total).
- Color change: ΔE <1.5 after 90 days @ 25 °C, with no haze or color shift.
- Aroma retention: ≥85 %, and microbial count target <1 CFU/mL. Confirm commercial sterility by validating the complete process and package together.
Sparkling Tea | Pilot-Scale Validation Guide
Overall Pilot Process Flow
1️⃣ Tea Extraction →
2️⃣ Filtration & Clarification →
3️⃣ Ingredient Blending (Sugar / Acid / Flavor) →
4️⃣ Cooling →
5️⃣ Carbonation →
6️⃣ Isobaric Filling →
7️⃣ Cooling & Storage Stability Validation
The original overview lists 2.0–3.5 g/L CO₂ and Step 5 lists 2.0–11 g/L as a pilot reference. The target depends on the tea and how fizzy it should be.
Step 1. Tea Extraction
Pilot Module
Jacketed extraction tank with temperature control (80–90 °C) and agitation.
Flow & Objective
Steep tea leaves or essence at a controlled temperature to get a balanced aroma and polyphenol yield.
Pilot trials fine-tune steeping time to keep bitterness low and color bright.
Step 2. Filtration & Clarification
Pilot Module
Two-stage filtration unit: a coarse filter (80–100 µm) followed by a fine membrane filter (1–3 µm).
Flow & Objective
Filter the brewed tea to remove suspended solids and stop haze from forming.
A clear base helps the drink stay clear and hold its carbonation.
Step 3. Ingredient Blending
Pilot Module
Mixing tank with temperature control (40–60 °C) and inline dosing pumps for syrups and acids.
Flow & Objective
Mix the filtered tea with sweeteners, acids, and natural flavors to match the formula.
Pilot runs check °Brix, pH, and flavor balance so every batch enters the carbonator at the same spec.
Step 4. Cooling
Pilot Module
Plate heat exchanger or chiller unit for fast cooling to 0–4 °C.
Flow & Objective
Chill the blended tea quickly to near 0 °C before carbonation so the liquid can hold more CO₂.
Pilot checks make sure the liquid hits the target temperature for steady gas absorption.
Step 5. Carbonation
Pilot Module
Carbonation unit with adjustable CO₂ pressure and flow controls.
Flow & Objective
Inject CO₂ to reach 2.0–11 g/L of dissolved gas, depending on the tea style and desired fizz.
Pilot trials evaluate how well the tea absorbs gas, holds bubbles, and feels on the palate.
Step 6. Isobaric Filling
Pilot Module
Isobaric filler with a CO₂ counter-pressure system and automatic capping.
Flow & Objective
Fill the carbonated tea into glass or aluminum containers under equalized pressure so the gas stays in the liquid.
Pilot runs track fill temperature, container pressure, and foaming.
Step 7. Cooling & Storage Stability Validation
Pilot Module
Tunnel pasteurizer or cold-storage chamber for post-fill stability testing.
Flow & Objective
Bring the filled containers gradually to 25 °C or below, then track carbonation and color over 60–90 days.
Pilot checks watch for gas loss, oxidation, and fading flavor.
Pilot Targets:
- Base tea extract solids: 0.3–0.5 %, pH 4.0–4.4 for stable carbonation.
- Carbonation level: 2.2–2.8 vol CO₂ @ 0–4 °C, filled under 5.0–6.0 bar counter-pressure.
- Color and aroma: ΔE <2.0 and aroma retention ≥80 % after 90 days @ 25 °C.
- Physical stability: no haze, no sediment, and no CO₂ loss >10 % during storage.
- Sensory profile: crisp fizz, smooth mouthfeel, and no astringency.
NFC / Cloudy Juice (Hot-Fill) | Pilot-Scale Validation Guide
Overall Pilot Process Flow
1️⃣ Juice Extraction / Reconstitution →
2️⃣ Enzyme Treatment (Optional) →
3️⃣ Pulp Adjustment & Blending →
4️⃣ Deaeration →
5️⃣ Homogenization (80–200 bar) →
6️⃣ Pasteurization (88–95 °C / 15–60 s) →
7️⃣ Hot Filling (85–90 °C) →
8️⃣ Cooling & Storage Stability Test
Step 1. Juice Extraction / Reconstitution
Pilot Module
Hydraulic juice press or reconstitution tank with agitation and temperature control. An automatic water-bath blending vessel is an option for sample mixing.
Flow & Objective
Press fresh NFC (not from concentrate) juice straight from fruit, or mix juice concentrate with water to hit the target °Brix.
Pilot trials measure pulp levels, cloudiness, and aroma before blending.
Step 2. Enzyme Treatment (Optional)
Pilot Module
Jacketed enzyme tank with temperature control (45–55 °C) and pH control.
Flow & Objective
Add pectinase or cellulase to adjust the thickness of the juice or make it easier to filter, depending on the pulp level.
Pilot tests find the right enzyme dose to balance clarity and body.
Step 3. Pulp Adjustment & Blending
Pilot Module
Agitated blending tank with variable mixer speed and a pulp dosing unit.
Flow & Objective
Set the pulp content (2–10%) by metering in fiber slurry or NFC pulp.
Pilot testing checks for even texture, how well the pulp stays evenly suspended, and consistent thickness.
Step 4. Deaeration
Pilot Module
Vacuum deaerator (100–200 mbar) with inline O₂ monitoring.
Flow & Objective
Strip out dissolved oxygen before heating to limit browning and flavor changes from oxidation.
Target a dissolved oxygen level below 0.5 mg/L going into the pasteurizer.
Step 5. Homogenization (80–200 bar)
Pilot Module
Single- or two-stage homogenizer with adjustable pressure (60–200 bar).
Flow & Objective
Break down pulp particles so they stay suspended and give the juice an even, cloudy look.
Pilot runs study how high-pressure shear affects cloud stability and final thickness.
Step 6. Pasteurization (88–95 °C / 15–60 s)
Pilot Module
Plate or tubular pasteurizer with a validated holding tube and a PU recorder.
Flow & Objective
Heat the juice to 88–95 °C for 15–60 s to inactivate enzymes and reduce microbes while keeping the fresh fruit flavor.
Pilot trials compare different PU levels to see how heat affects color and pulp structure.
Step 7. Hot Filling (85–90 °C)
Pilot Module
Hot-fill station with temperature-controlled filling heads and an automatic capper.
Flow & Objective
Fill the pasteurized juice at 85–90 °C into heat-resistant PET or glass bottles and cap them right away.
Pilot checks look for bottle warping, tight cap seals, and proper vacuum formation as the bottle cools.
Step 8. Cooling & Storage Stability Test
Pilot Module
Water-bath cooler and temperature-controlled stability chamber.
Flow & Objective
Cool the filled bottles steadily to 30 °C or below to limit oxygen pickup.
Store samples at room temperature (25–35 °C) for 3–6 months to track cloud stability and color change.
Pilot Targets:
- Total solids: 8–12 °Bx, pH 3.5–4.2, suited for hot-fill pasteurization.
- Pasteurization: 90–95 °C / 30 s → Hot-fill ≥85 °C → Hold 30 s → Seal.
- Cloud stability: creaming index <10 % after 30 days @ 25 °C, with no visible pulp settling.
- Nutrient and color retention: Vitamin C retention ≥85 %, and ΔE <2.0 after 90 days.
- Microbial count: <10 CFU/mL, with no container swelling after incubation.
Aseptic Juice / Blend (Shelf-Stable) | Pilot-Scale Validation Guide
Overall Pilot Process Flow
1️⃣ Juice Reconstitution / Extraction →
2️⃣ Ingredient Blending (Sugar / Acid / Flavor / Vitamin) →
3️⃣ Deaeration →
4️⃣ Homogenization →
5️⃣ UHT Sterilization (135–140 °C / 2–4 s) →
6️⃣ Aseptic Filling (PET / Carton / Pouch) →
7️⃣ Shelf-Life & Stability Observation
The original overview lists 100–150 bar for homogenization and Step 4 lists 100–200 bar as a pilot reference. The working pressure depends on the recipe and equipment.
Step 1. Juice Reconstitution / Extraction
Pilot Module
Reconstitution tank with temperature control and gentle stirring for concentrates, or a hydraulic press for whole fruit. An automatic water-bath blending vessel is an option for sample mixing.
Flow & Objective
Mix juice concentrate with water to hit the target °Brix, or press fresh fruit for an NFC blend base.
Pilot checks evaluate color, aroma, and starting cloudiness so each batch starts from the same baseline.
Step 2. Ingredient Blending
Pilot Module
Heated blending tank with variable-speed agitation and dosing pumps for acids and vitamins.
Flow & Objective
Mix the juice bases with sweeteners, acids, flavors, and nutrients at 60–70 °C until everything dissolves completely.
Pilot tests check pH (3.5–4.2), even °Brix, and flavor stability before heat treatment.
Step 3. Deaeration
Pilot Module
Vacuum deaerator (80–150 mbar) with an inline O₂ sensor and a recirculation pump.
Flow & Objective
Remove dissolved oxygen before heating to stop browning and protect oxygen-sensitive vitamins.
Target a dissolved oxygen level below 0.5 mg/L to protect the drink during shelf storage.
Step 4. Homogenization (100–200 bar)
Pilot Module
Two-stage homogenizer with pressure control and a temperature-controlled feed.
Flow & Objective
Homogenize the blended juice at 100–200 bar to keep pulp and flavor evenly distributed.
Pilot checks measure droplet size and look for a uniform appearance after sterilization.
Step 5. UHT Sterilization (135–140 °C / 2–4 s)
Pilot Module
Indirect tubular UHT unit with a validated holding tube, a flow-diversion valve, and a PU recorder.
Flow & Objective
Run within the archived UHT trial range of 135–140 °C for 2–4 s. Taste-test the juice at each heat setting, and confirm commercial sterility by validating the complete process and package together.
Pilot trials compare how different heat loads affect color, aroma, and nutrient loss.
Step 6. Aseptic Filling
Pilot Module
Aseptic filling cabinet with HEPA-filtered laminar airflow and automatic capping inside an ISO Class 5 zone.
Flow & Objective
Fill the sterilized juice into pre-sterilized PET bottles, cartons, or pouches under aseptic conditions.
Pilot validation tracks headspace oxygen, how well the sterility controls work, and how well the package seals.
Step 7. Shelf-Life & Stability Observation
Pilot Module
Temperature-controlled stability chamber for long-term storage testing (25–40 °C).
Flow & Objective
Store aseptic samples for 3–9 months to track color shifts, pH drift, and flavor fade.
Pilot data help the team adjust the formula to limit oxidation and hold on to nutrients.
Pilot Targets:
- Total solids: 10–14 °Bx, pH 3.5–4.5 for aseptic UHT processing.
- UHT settings: 135–140 °C / 3–4 s → Fill ≤25 °C (aseptic).
- Nutrient and color retention: Vitamin C retention ≥85 %; ΔE <2.0 after 90 days @ 25 °C.
- Physical stability: no sediment, no phase separation, and no color fading.
Pilot microbial count target: <1 CFU/mL. Check for container swelling after incubation. Validate commercial sterility for the full process and package.
Sparkling Juice (Partial Carbonation) | Pilot-Scale Validation Guide
Overall Pilot Process Flow
1️⃣ Juice Preparation / Blending →
2️⃣ Deaeration →
3️⃣ Cooling →
4️⃣ Partial Carbonation (CO₂ 0.8–2.0 g/L) →
5️⃣ Isobaric Filling (PET / Can / Glass) →
6️⃣ Cooling & Pasteurization (Optional) →
7️⃣ Storage Stability & CO₂ Retention Evaluation
Step 1. Juice Preparation / Blending
Pilot Module
Agitated blending tank with temperature control (40–60 °C) and a precise dosing system for sugar and acid. An automatic water-bath blending vessel is an option for sample mixing.
Flow & Objective
Prepare the fruit juice base to a set Brix level (10–14 °Bx) and acidity balance (pH 3.4–4.0).
Pilot trials track the sweetness-to-acidity ratio and clarify the juice before carbonation.
Step 2. Deaeration
Pilot Module
Vacuum deaerator (100–200 mbar) with an inline O₂ sensor and recirculation pump.
Flow & Objective
Remove dissolved oxygen before carbonation so the juice absorbs gas more easily and oxidizes less.
Target an oxygen content below 0.5 mg/L for long-term stability.
Step 3. Cooling
Pilot Module
Plate heat exchanger or glycol chiller for rapid cooling to 0–4 °C.
Flow & Objective
Cool the deaerated juice to near 0 °C so it absorbs as much CO₂ as possible during carbonation.
During the trial, track the inlet temperature and watch for foaming.
Step 4. Partial Carbonation (CO₂ 0.8–2.0 g/L)
Pilot Module
Carbonation vessel with pressure control (1.5–3 bar) and an inline CO₂ dosing system.
Flow & Objective
Inject CO₂ to reach light to moderate fizz (0.8–2.0 g/L) for a smooth sparkling texture.
Pilot trials adjust carbonation pressure and holding time to match the target sensory intensity.
Step 5. Isobaric Filling
Pilot Module
Isobaric filling unit with pressure compensation and a CO₂ counterpressure system.
Flow & Objective
Fill the carbonated juice into PET bottles, aluminum cans, or glass containers under balanced pressure to keep CO₂ from escaping.
Pilot monitoring tracks internal pressure, fill temperature (0–4 °C), and foam control.
Step 6. Cooling & Pasteurization (Optional)
Pilot Module
Tunnel pasteurizer or water-bath system with controlled heat exposure.
Flow & Objective
Cool or lightly pasteurize the filled containers to improve microbiological safety without losing too much CO₂.
Pilot tests find the right PU level (10–20) for partially carbonated products.
Step 7. Storage Stability & CO₂ Retention Evaluation
Pilot Module
Temperature-controlled storage chamber (25–37 °C) and a gas analyzer to measure headspace CO₂.
Flow & Objective
Store samples for 3–6 months to test gas retention, flavor stability, and visual clarity.
Pilot data show how well the packaging works with the drink and how fast carbonation drops over time.
Pilot Targets:
- Total solids 10–12 °Bx, pH 3.3–3.8 for carbonation and flavor stability.
- Carbonation 1.5–2.2 vol CO₂ @ 0–4 °C; filling under 4.0–5.0 bar.
- ΔE <2.0 and CO₂ loss <10 % after 90 days @ 25 °C.
- No pulp flotation, haze, or gas breakout during storage.
- Aroma retention ≥85 %, with a smooth, refreshing mouthfeel.
Standard CSD (Syrup + Water) | Pilot-Scale Validation Guide
Overall Pilot Process Flow
1️⃣ Syrup Preparation →
2️⃣ Water Deaeration →
3️⃣ Syrup–Water Blending →
4️⃣ Cooling (0–4 °C) →
5️⃣ Carbonation (CO₂ 3.0–11.0 g/L) →
6️⃣ Isobaric Filling →
7️⃣ Cooling & Storage Observation
Step 1. Syrup Preparation
Pilot Module
Jacketed syrup preparation tank with agitation, heating (up to 85 °C), and inline Brix monitoring. An automatic water-bath blending vessel is an option for sample mixing.
Flow & Objective
Dissolve sucrose, HFCS, or sweetener blends into preheated water until fully uniform (Brix 55–65 °Bx).
Pilot trials confirm mixing time and viscosity control before cooling.
Step 2. Water Deaeration
Pilot Module
Vacuum deaerator (50–150 mbar) connected to an oxygen analyzer and recirculation pump.
Flow & Objective
Remove dissolved oxygen from the process water to improve carbonation efficiency and product stability.
Target residual O₂ below 0.3 mg/L.
Step 3. Syrup–Water Blending
Pilot Module
Inline blending unit or proportioning system with a flow-controlled mixing ratio (1:4 to 1:6).
Flow & Objective
Dilute the syrup with deaerated water to reach the final beverage strength.
Pilot blending checks the target Brix (8–12 °Bx) and pH (2.8–3.4) to keep the formula exact.
Step 4. Cooling (0–4 °C)
Pilot Module
Plate heat exchanger or glycol chiller system.
Flow & Objective
Cool the blended liquid to 0–4 °C so CO₂ dissolves better and foams less during carbonation.
Pilot trials check cooling efficiency and even temperature control.
Step 5. Carbonation (CO₂ 3.0–11.0 g/L)
Pilot Module
Carbonator with adjustable pressure (3–6 bar), an inline CO₂ flow meter, and temperature control.
Flow & Objective
Inject CO₂ to reach the target carbonation level (3.0–11.0 g/L), based on product style and sweetness.
Pilot validation compares how well bubbles hold and how sharp the sensory “bite” feels across CO₂ levels.
Step 6. Isobaric Filling
Pilot Module
Isobaric filling system with counterpressure control and automatic sealing.
Flow & Objective
Fill the carbonated beverage into cans or PET bottles under equal pressure to minimize gas loss.
Pilot checks track fill temperature (0–4 °C), internal pressure, and foam behavior.
Step 7. Cooling & Storage Observation
Pilot Module
Tunnel pasteurizer (optional) or controlled storage chamber (25–35 °C).
Flow & Objective
Cool sealed products to room temperature or run light pasteurization (PU 10–20) for microbiological stability.
Track CO₂ retention, flavor quality, and package warping over 90 days.
Pilot Targets:
- Syrup concentration 10–12 °Bx; final pH 2.8–3.2 after carbonation.
- Carbonation level 2.8–3.2 vol CO₂ @ 0–2 °C; fill pressure 5.0–6.0 bar.
- Mixing ratio syrup:water = 1:4.8 ±2 %.
- ΔE <2.0 and CO₂ loss <8 % after 90 days @ 25 °C.
- Sensory balance: sweetness/acidity ratio 13–15, with no off-flavor or flatness.
Zero / Low-Sugar CSD | Pilot-Scale Validation Guide
Overall Pilot Process Flow
1️⃣ Syrup Base Preparation (with High-Intensity Sweeteners) →
2️⃣ Water Deaeration →
3️⃣ Syrup–Water Blending →
4️⃣ Cooling (0–4 °C) →
5️⃣ Carbonation (CO₂ 3.0–11.0 g/L) →
6️⃣ Isobaric Filling →
7️⃣ Cooling & Storage Stability Validation
Step 1. Syrup Base Preparation
Pilot Module
Heated blending tank with a precise dosing system and pH monitoring (target pH 2.8–3.4).
Flow & Objective
Prepare a concentrated syrup base by dissolving high-intensity sweeteners (such as sucralose, stevia, and aspartame) along with acids, preservatives, and flavors.
Pilot trials test perceived sweetness, solubility, and pH-buffer interactions to keep the base stable during carbonation.
Step 2. Water Deaeration
Pilot Module
Vacuum deaerator (50–150 mbar) with an inline oxygen sensor and recirculation pump.
Flow & Objective
Remove dissolved oxygen from the process water to limit oxidation of sweeteners and flavors.
Pilot checks confirm O₂ < 0.3 mg/L for efficient carbonation and stable flavor.
Step 3. Syrup–Water Blending
Pilot Module
Inline blending unit or automatic proportioning system (typical ratio 1:5 to 1:6).
Flow & Objective
Mix the syrup base and deaerated water to reach the final beverage Brix (1–3 °Bx) and target acid-to-sweetness balance.
Pilot trials track conductivity, flavor consistency, and blending accuracy.
Step 4. Cooling (0–4 °C)
Pilot Module
Plate heat exchanger or glycol chiller with an adjustable flow rate.
Flow & Objective
Cool the beverage base to 0–4 °C to maximize CO₂ solubility and keep the sweeteners stable.
Pilot data confirm low foaming and an even temperature before carbonation.
Step 5. Carbonation (CO₂ 3.0–11.0 g/L)
Pilot Module
Carbonation unit with pressure control (3–6 bar), an inline CO₂ meter, and a gas recirculation system.
Flow & Objective
Inject CO₂ into the chilled beverage under pressure to reach 3.0–11.0 g/L and get the desired fizz.
Pilot studies test how sweetener type and acidity level affect CO₂ retention.
Step 6. Isobaric Filling
Pilot Module
Isobaric filler with a counterpressure system and automatic sealing control.
Flow & Objective
Fill the carbonated beverage under balanced pressure (typically 3–5 bar) into PET, can, or glass containers.
Pilot validation checks internal pressure, fill temperature (0–4 °C), and cap tightness.
Step 7. Cooling & Storage Stability Validation
Pilot Module
Tunnel pasteurizer (optional) or stability chamber (25–37 °C).
Flow & Objective
Store finished products for 60–120 days to track CO₂ retention, sweetness stability, and flavor loss.
Pilot monitoring spots off-flavors and sweetener breakdown (hydrolysis) under heat stress.
Pilot Targets:
- Total solids 1.0–2.0 °Bx; pH 2.8–3.3 for flavor and carbonation stability.
- Sweetener system: sucralose + acesulfame-K (80–120 ppm total).
- Carbonation level 2.6–3.0 vol CO₂ @ 0–4 °C; fill under 5.0–6.0 bar.
- CO₂ retention ≥90 % and ΔE <1.5 after 90 days @ 25 °C.
- Clean sweetness, with no metallic or bitter aftertaste.
Functional Sparkling (Vitamin / Mineral / Adaptogen) | Pilot-Scale Validation Guide
Overall Pilot Process Flow
1️⃣ Functional Premix Preparation →
2️⃣ Water Deaeration →
3️⃣ Solution Blending →
4️⃣ Cooling (0–4 °C) →
5️⃣ Carbonation (CO₂ 1.5–11.0 g/L) →
6️⃣ Isobaric Filling →
7️⃣ Cooling & Shelf Stability Evaluation
Step 1. Functional Premix Preparation
Pilot Module
Stainless steel blending tank with gentle agitation and a nitrogen blanketing system.
Flow & Objective
Dissolve functional active ingredients—such as vitamins (B-complex, C), minerals (Mg, Zn), or adaptogens (ginseng, ashwagandha)—into purified water under a nitrogen blanket to prevent oxidation.
Pilot studies check solubility, color changes, and taste masking before carbonation.
Step 2. Water Deaeration
Pilot Module
Vacuum deaerator (80–150 mbar) with an inline oxygen sensor and recirculation loop.
Flow & Objective
Remove dissolved oxygen to stop vitamins from oxidizing and help CO₂ dissolve better.
Target oxygen content < 0.5 mg/L.
Step 3. Solution Blending
Pilot Module
Inline blending system with a precise dosing pump and conductivity control.
Flow & Objective
Mix the functional premix with acids, flavors, and sweeteners to hit the target Brix (2–5 °Bx) and pH (3.0–3.8).
Pilot validation checks how ingredients interact and whether the blend tends to foam before carbonation.
Step 4. Cooling (0–4 °C)
Pilot Module
Plate heat exchanger or glycol chiller with an adjustable cooling rate.
Flow & Objective
Cool the functional beverage base to 0–4 °C to improve CO₂ solubility and limit nutrient loss.
Pilot checks confirm an even temperature and clear appearance.
Step 5. Carbonation (CO₂ 1.5–11.0 g/L)
Pilot Module
Carbonation tank with precise pressure control (2–4 bar) and an inline CO₂ dosing valve.
Flow & Objective
Inject CO₂ to reach 1.5–11.0 g/L, keeping a gentle fizz that fits the sensory profile of a functional drink.
Pilot trials test how carbonation affects vitamin retention and how evenly adaptogens stay dispersed.
Step 6. Isobaric Filling
Pilot Module
Isobaric filling machine with nitrogen headspace flushing and automatic sealing.
Flow & Objective
Fill the carbonated product under balanced pressure (2–3 bar) into aluminum cans or glass bottles to prevent CO₂ loss.
Pilot checks verify fill accuracy, headspace O₂, and seal tightness.
Step 7. Cooling & Shelf Stability Evaluation
Pilot Module
Stability chamber (25–40 °C) and CO₂ retention analyzer.
Flow & Objective
Store filled samples for 60–180 days to measure nutrient breakdown, color fading, and carbonation loss.
Pilot data help teams decide whether to add antioxidants and how best to encapsulate vitamins.
Pilot Targets:
- Total solids 2–6 °Bx, pH 3.0–3.6; suitable for vitamin/mineral systems.
- Carbonation 2.0–2.8 vol CO₂ @ 0–4 °C; fill under 5.0–6.0 bar.
- Vitamin C retention ≥70 % and adaptogen activity ≥75 % after 180 days @ 25 °C.
- CO₂ retention ≥85 %, ΔE <2.0; no haze or precipitation.
- Balanced sensory profile: bright flavor, smooth sparkle, and no bitterness.
Bottled Water (Still) | Pilot-Scale Validation Guide
Overall Pilot Process Flow
1️⃣ Raw Water Intake →
2️⃣ Filtration & Pre-Treatment →
3️⃣ Activated Carbon Adsorption →
4️⃣ RO / UF / Deionization →
5️⃣ Mineral Balance Adjustment (Optional) →
6️⃣ UV Sterilization →
7️⃣ Filling & Capping (Hygienic / Aseptic) →
8️⃣ Storage Stability Evaluation
Step 1. Raw Water Intake
Pilot Module
Raw water collection and storage tank with an inlet strainer and flow meter.
Flow & Objective
Collect a representative sample of raw water from the source (municipal, well, or spring).
Pilot testing records baseline conductivity, cloudiness (turbidity), and microbial load.
Step 2. Filtration & Pre-Treatment
Pilot Module
Sand filter and cartridge filter (5–10 µm) with differential pressure gauges.
Flow & Objective
Remove suspended solids and fine particles (colloids) to bring turbidity down (<1 NTU (a unit for measuring cloudiness)).
Pilot data show how well the filters work and how often they need replacing.
Step 3. Activated Carbon Adsorption
Pilot Module
Activated carbon column with backwash capability and flow rate control.
Flow & Objective
Strip out organic matter, chlorine, and odor compounds to improve taste.
Pilot tests measure total organic carbon (TOC) reduction and leftover chlorine (<0.1 mg/L).
Step 4. RO / UF / Deionization
Pilot Module
RO or UF skid system with conductivity and total dissolved solids (TDS) monitoring.
Flow & Objective
Remove dissolved ions and microbes to bring TDS < 50 mg/L for purified or low-mineral water.
Pilot data measure how much the membrane blocks (rejection rate) and how much energy the step uses.
Step 5. Mineral Balance Adjustment (Optional)
Pilot Module
Mineral dosing and blending tank with pH control and an inline conductivity probe.
Flow & Objective
Add measured amounts of mineral salts (Ca²⁺, Mg²⁺, K⁺) to bring back a natural taste and balance the electrolyte profile.
Pilot tuning sets the target conductivity (80–200 µS/cm).
Step 6. UV Sterilization
Pilot Module
UV sterilizer (254 nm) with a flow cell and intensity sensor.
Flow & Objective
Pass the treated water under UV light to inactivate microbes before filling.
Use the pilot test to measure microbial reduction (target >99.9%) and check for any residual chemical effects.
Step 7. Filling & Capping (Hygienic / Aseptic)
Pilot Module
Hygienic filling station or aseptic cabinet with HEPA-filtered laminar airflow.
Flow & Objective
Fill purified water into PET or glass bottles under hygienic or aseptic conditions.
Pilot checks measure cap torque, fill level, and headspace to prevent contamination.
Step 8. Storage Stability Evaluation
Pilot Module
Stability chamber (25–40 °C) and microbial testing setup.
Flow & Objective
Store bottled samples for 90–180 days to watch for cloudiness (turbidity), microbial regrowth, and mineral settling.
Use the pilot data to assess whether the water stays clear and retains its taste during storage.
Pilot Targets:
- TDS 80–180 mg/L, hardness 40–80 ppm, alkalinity 20–50 ppm for balanced taste.
- Dissolved oxygen 6–9 mg/L; no residual chlorine (<0.05 mg/L).
- Microbial count <1 CFU/100 mL; no coliforms or Pseudomonas detected.
- NTU <0.3, ΔE <0.5 after 180 days @ 25 °C; no off-flavor.
- Compliance with bottled water standards (Codex/WHO/EU).
Sparkling Water (Carbonated Drinking Water) | Pilot-Scale Validation Guide
Overall Pilot Process Flow
1️⃣ Raw Water Filtration →
2️⃣ RO / UF Purification →
3️⃣ Mineral Adjustment (Optional) →
4️⃣ Cooling (0–4 °C) →
5️⃣ Carbonation →
6️⃣ Isobaric Filling →
7️⃣ Cooling & Storage Stability Evaluation
The original overview lists 3.5–6.0 g/L CO₂ and Step 5 lists 3.5–11.0 g/L as a pilot reference. The target depends on how fizzy the finished water should be.
Step 1. Raw Water Filtration
Pilot Module
Sand filter and 5 μm cartridge filter with pressure-drop monitoring.
Flow & Objective
Remove suspended solids and colloids to lower turbidity (< 1 NTU).
During the pilot run, record the flow rate, water clarity, and filter maintenance cycle.
Step 2. RO / UF Purification
Pilot Module
Compact RO or UF system with conductivity and TDS monitoring.
Flow & Objective
Purify water to TDS < 100 mg/L for a clean mouthfeel and consistent CO₂ absorption.
During the pilot run, confirm the rejection rate and energy use.
Step 3. Mineral Adjustment (Optional)
Pilot Module
Mineral dosing tank with pH and conductivity control (80–250 µS/cm target).
Flow & Objective
Add trace minerals (Ca²⁺, Mg²⁺, Na⁺, K⁺) to tailor the taste profile and mouthfeel.
Use pilot tests to choose the electrolyte ratio for a balanced flavor and check how the drink foams.
Step 4. Cooling (0–4 °C)
Pilot Module
Plate heat exchanger or glycol chiller with PID temperature control.
Flow & Objective
Cool the water to near freezing (0–4 °C) to maximize CO₂ solubility and keep gas in solution.
During the pilot run, verify even cooling and throughput capacity.
Step 5. Carbonation (CO₂ 3.5–11.0 g/L)
Pilot Module
Pressurized carbonation tank with a CO₂ injection valve and pressure regulator (4–8 bar).
Flow & Objective
Inject CO₂ under pressure to reach the target gas content (3.5–11.0 g/L) for the desired mouthfeel (from still to strongly sparkling).
Pilot trials measure the CO₂ absorption rate, bubble size, and loss of fizz over time.
Step 6. Isobaric Filling
Pilot Module
Isobaric filler with CO₂ counter-pressure and a temperature-controlled feed (0–2 °C).
Flow & Objective
Fill carbonated water into PET, aluminum, or glass containers under counter-pressure to prevent CO₂ loss.
Pilot validation checks headspace oxygen (< 0.5 mg/L), seal integrity, and foaming during filling.
Step 7. Cooling & Storage Stability Evaluation
Pilot Module
Stability chamber (25–37 °C) and CO₂ retention analyzer.
Flow & Objective
Store samples for 90–180 days to check CO₂ retention, clarity, and mineral precipitation under ambient conditions.
Pilot results help set the mineral levels and container choice for shelf-life testing.
Pilot Targets:
- TDS 30–150 mg/L and pH 6.8–7.6, supporting carbonation stability and mouthfeel.
- Carbonation 3.0–4.0 vol CO₂ @ 0–4 °C; fill pressure 5.0–6.0 bar.
- CO₂ retention ≥90 % and ΔE <0.5 after 180 days @ 25 °C.
- No gas breakout, haze, or flavor drift during storage.
- Sensory score ≥8/9 for bubble fineness and clean taste.
Milk Tea (Aseptic) | Pilot-Scale Validation Guide
Overall Pilot Process Flow
1️⃣ Tea Extraction →
2️⃣ Milk Base Preparation →
3️⃣ Blending & Homogenization →
4️⃣ UHT Sterilization (137–142 °C / 3–5 s) →
5️⃣ Aseptic Holding & Cooling →
6️⃣ Aseptic Filling →
7️⃣ Stability & Shelf-Life Evaluation
Step 1. Tea Extraction
Pilot Module
Tea brewing tank with agitation, temperature control (85–95 °C), and a filter section (mesh ≤ 100 µm).
Flow & Objective
Steep tea leaves or dissolve instant tea powder in hot water to extract polyphenols and flavor compounds.
Pilot trials track extraction time, temperature, and turbidity to balance color and astringency.
Step 2. Milk Base Preparation
Pilot Module
Jacketed mixing tank with gentle agitation and temperature control (60–70 °C).
Flow & Objective
Reconstitute milk powder or use fresh milk to prepare the dairy base.
Add sugar and stabilizers (such as carrageenan or CMC) to improve mouthfeel and keep the base stable under heat.
During the pilot run, adjust the pH to 6.6–6.8 to help proteins disperse evenly.
Step 3. Blending & Homogenization
Pilot Module
Two-stage homogenizer (150/50 bar) with inline temperature control.
Flow & Objective
Blend the tea extract with the milk base at a 1:1–1:2 ratio, depending on the desired tea strength.
Homogenize at 150/50 bar to form a stable emulsion and prevent phase separation.
Pilot trials evaluate viscosity, emulsion uniformity, and foam control.
Step 4. UHT Sterilization (137–142 °C / 3–5 s)
Pilot Module
Indirect tubular UHT system with a validated holding tube and differential pressure monitoring.
Flow & Objective
Heat-treat the product at 137–142 °C for 3–5 s to inactivate microbes while preserving color and flavor.
Pilot trials check how the heat load affects Maillard browning and milk protein clumping.
Step 5. Aseptic Holding & Cooling
Pilot Module
Aseptic holding tank with nitrogen blanketing and a plate cooler (inlet > 130 °C → outlet < 25 °C).
Flow & Objective
Hold the sterilized milk tea under aseptic conditions and cool it rapidly to < 25 °C to prevent precipitation.
Pilot validation checks residence time, protein stability, and system air-tightness.
Step 6. Aseptic Filling
Pilot Module
Aseptic filling cabinet with HEPA filtration (ISO Class 5) and automatic sealing.
Flow & Objective
Fill the cooled milk tea into pre-sterilized bottles or cartons under aseptic conditions.
The archived pilot target is headspace oxygen < 0.5 mg/L. Monitor packaged samples for post-fill contamination.
Step 7. Stability & Shelf-Life Evaluation
Pilot Module
Stability chamber (25–40 °C) and viscometer to track phase stability.
Flow & Objective
Store samples for 90–180 days to track color change, sediment, and flavor loss.
Pilot tests evaluate emulsion stability and reactions between proteins and polyphenols over time.
Pilot Targets:
- pH 6.4–6.6 for protein–polyphenol compatibility; total solids 10–14 %.
- UHT 138 °C / 3 s; fill ≤25 °C (aseptic).
- Viscosity 25–40 mPa·s @ 50 s⁻¹; no flocculation or phase separation (30 days).
- Aroma retention ≥85 %, ΔE <2.0 after 90 days @ 25 °C.
- Pilot microbial count target: <1 CFU/mL. Check for package swelling and sediment. Validate commercial sterility for the full process and package.
RTD Coffee (Cold Brew / Aseptic) | Pilot-Scale Validation Guide
Overall Pilot Process Flow
1️⃣ Roast Profile & Grinding (Optional) →
2️⃣ Cold Extraction (4–20 °C, 6–18 h) →
3️⃣ Coarse Filtration →
4️⃣ Clarification (Centrifuge / Fining / 1–5 µm) →
5️⃣ Oil Reduction (Optional) →
6️⃣ Deaeration & N₂ Blanketing →
7️⃣ UHT (135–140 °C / 2–4 s) →
8️⃣ Aseptic Holding & Cooling →
9️⃣ Aseptic Filling →
🔟 Shelf-Life & Sensory Stability
Step 1. Roast Profile & Grinding (Optional)
Pilot Module
Sample roaster and burr grinder with calibrated particle size (D50 600–1,000 µm).
Flow & Objective
Select the roast level for cold-brew (typically medium to medium-dark) and set the grind size to limit fine particles while getting full extraction.
Step 2. Cold Extraction (4–20 °C, 6–18 h)
Pilot Module
Jacketed extractor with gentle agitation and an inline TDS refractometer.
Flow & Objective
Brew at a coffee:water ratio of 1:4–1:8 (w/w) to hit a target TDS of 1.5–3.0%; control extraction time and temperature to balance acidity, bitterness, and aroma.
Step 3. Coarse Filtration
Pilot Module
Screen filter (100–200 µm) or bag filter with low-shear transfer.
Flow & Objective
Remove coffee grounds and large fines to protect downstream clarifiers and heat exchangers.
Step 4. Clarification (Centrifuge / 1–5 µm)
Pilot Module
Disc-stack centrifuge (optional), depth filter with DE or cellulose filter aid, and a final 1–5 µm membrane.
Flow & Objective
Reduce turbidity to improve visual clarity, limit sediment over shelf life, and reduce buildup in the UHT unit.
Step 5. Oil Reduction (Optional)
Pilot Module
Centrifugal clarifier or oil separator, with optional adsorption trials (PVPP/AC).
Flow & Objective
Remove excess surface oils that cause oxidation and neck rings in bottles, while keeping enough oil for body and mouthfeel.
Step 6. Deaeration & N₂ Blanketing
Pilot Module
Vacuum deaerator (80–150 mbar) with an inline O₂ sensor and N₂ sparging/blanketing.
Flow & Objective
Bring dissolved oxygen below 0.5 mg/L to limit oxidation, stale flavors, and color darkening.
Step 7. UHT (135–140 °C / 2–4 s)
Pilot Module
Indirect tubular UHT system with a validated holding tube, PU recorder, and flow diversion valve.
Flow & Objective
Target commercial sterility for low-acid coffee while limiting flavor loss and color shift; compare PU levels against sensory quality.
Step 8. Aseptic Holding & Cooling
Pilot Module
Aseptic surge tank with an N₂ blanket and a plate cooler to <25 °C.
Flow & Objective
Maintain sterile conditions and cool the coffee quickly to slow down heat-driven reactions after UHT (such as ongoing melanoidin browning).
Step 9. Aseptic Filling
Pilot Module
ISO Class 5 aseptic cabinet with headspace O₂ control and automatic sealing.
Flow & Objective
Fill into pre-sterilized PET, glass, or cartons; keep headspace O₂ <0.5 mg/L, and optionally add N₂ for still packaging without carbonation.
Step 10. Shelf-Life & Sensory Stability
Pilot Module
Stability chamber (25–37 °C), colorimeter (ΔE), GC–MS for volatile compounds, and TDS/TA meters.
Flow & Objective
Observe samples for 3–9 months for oxidation notes, color shifts, sediment, and TDS drift to set target PU and O₂ specifications.
Pilot Targets & Notes
- Typical pH 4.8–5.2; The archived route uses UHT and aseptic processing for this low-acid beverage. Validate the selected process and package. HPP is an alternative outside this aseptic route.
- Adjust extraction to reach TDS 1.5–3.0%, and control fine particles to reduce haze and equipment fouling.
- For flavored or latte versions, validate stabilizers (such as CMC or carrageenan) in separate trials.
- CIP sequence: warm rinse → 1–2% NaOH @ 60–70 °C → acid wash → final rinse; inspect surfaces for coffee oil buildup.
Hard Kombucha / Low-Alcohol Ferments | Pilot-Scale Validation Guide
Overall Pilot Process Flow
1️⃣ Tea Extraction (Black/Green/Oolong) →
2️⃣ Sugaring & Nutrients →
3️⃣ Primary Fermentation (SCOBY or Controlled Mixed Culture) →
4️⃣ ABV (alcohol by volume) Steering (Arrest / Dilution / Yeast Switch) →
5️⃣ Clarification (Coarse → Fine) →
6️⃣ Flavoring / Blending (Fruit/Herb) →
7️⃣ Carbonation (1.8–2.8 vol CO₂) →
8️⃣ Packaging Route (Live + Cold Chain (keeping the product chilled during storage and transport) / Tunnel Pasteurization / Aseptic) →
9️⃣ Shelf Stability & Micro Safety
Step 1. Tea Extraction
Pilot Module
Jacketed extraction tank (80–95 °C) with ≤100 µm filtration.
Flow & Objective
Brew tea to 3–6 g/L solids to establish a baseline of polyphenols for acidity balance and antioxidant content.
Step 2. Sugaring & Nutrients
Pilot Module
Heated blending tank, inline Brix meter, and nutrient dosing pump.
Flow & Objective
Add sucrose or glucose to reach 10–14 °Bx, and dose yeast nutrients (targeting YAN 150–200 mg/L).
Set the starting pH at 4.2–4.6 at inoculation to support culture growth and track acidification over time.
Step 3. Primary Fermentation
Pilot Module
Closed fermenter with a sampling port, jacket cooling, and a CO₂ vent, plus optional aerobic headspace control.
Flow & Objective
Inoculate with a SCOBY (yeast plus acetic and lactic acid bacteria) or a defined mixed culture (such as S. cerevisiae + Acetobacter/Lactobacillus).
Ferment at 22–28 °C for 2–7 d to reach a target pH of 2.8–3.4 and TA of 3–8 g/L, tracking the drop in specific gravity to estimate ABV.
Step 4. ABV Steering (for Hard vs Low-Alcohol)
Pilot Module
Fermenter temperature and feeding controls, dilution tank, and optional valve logic to arrest fermentation.
Flow & Objective
Low-Alcohol (≤0.5–1.2% ABV): Chill early (cold-crash) and microfilter (0.45–1.0 µm), or dilute with acidified tea to meet the ABV limit.
Hard Kombucha (3.5–7% ABV): Run primary fermentation to the target ABV before moving to the next step; optionally feed sugar in stages (“fed-batch”).
The archived pre-packaging pH target is < 4.2. Validate the fermentation and packaging controls for the specific product.
Step 5. Clarification (Coarse → Fine)
Pilot Module
Bag filter (50–100 µm) → DE depth filter → 0.65–1.0 µm final filter (for live products) or 0.45 µm filter (for polished products).
Flow & Objective
Reduce haze and stabilize clarity to protect downstream carbonation and filling equipment, while balancing clarity against “live” culture claims if needed.
Step 6. Flavoring / Blending
Pilot Module
Sanitary blending tank, inline dosing for fruit purées or extracts, and O₂/N₂ headspace control.
Flow & Objective
Blend in fruit or herbal flavors and adjust the batch to Brix 4–8 °Bx and pH 3.0–3.6.
For low-alcohol versions, check whether ABV rises again after blending.
Step 7. Carbonation (1.8–2.8 vol CO₂)
Pilot Module
Carbonation tank with 2–4 bar pressure control, chiller to 0–2 °C, and inline CO₂ meter.
Flow & Objective
Carbonate from a gentle fizz to a lively sparkle (1.8–2.8 vol) to match the beverage style and acidity, while keeping foam low at the filler.
Step 8. Packaging Route
Pilot Module
Live + Cold Chain: Isobaric filler with TPO control, filling at 0–2 °C, and cold storage at 0–4 °C.
Tunnel Pasteurization: Packaged in bottles or cans and heated to 12–20 PU; check for flavor changes and changes in volatile acidity (VA).
Aseptic (for low-alcohol flavored ferments): Short UHT-style heat treatment paired with an aseptic filler (ISO 5).
Flow & Objective
Select the packaging route based on distribution and shelf-life needs, and verify headspace O₂ < 0.5 mg/L (for live products) and seal integrity.
Step 9. Shelf Stability & Micro Safety
Pilot Module
Stability chamber (4 / 25 / 35 °C), microbial testing (yeast and bacteria), and analyzers for VA (acetic acid), pH, ABV, and CO₂ retention.
Flow & Objective
Track ABV drift (±0.2–0.3% v/v) and pH stability over 90–180 d.
For live products, confirm that packages do not bloat or referment at ambient temperatures; evaluate sorbate or benzoate only where allowed by regulations and acceptable for taste.
Pilot Targets & Notes
- Archived pH target: pH ≤4.2 at packaging, with typical kombucha at pH 2.8–3.4; track TA and VA so acidity does not become too sharp.
- ABV control toolbox: stop fermentation early (chilling plus filtration), dilute with acidified tea, select low-ethanol yeast strains, or use fed-batch sugar additions for higher-ABV styles.
- Oxygen: keep dissolved oxygen low after fermentation to limit oxidation and sharp rises in acetic acid.
- Allergen/label: confirm caffeine levels, alcohol declarations, and live-culture claims as required.
Electrolyte / Isotonic (Cold-Fill) | Pilot-Scale Validation Guide
Overall Pilot Process Flow
1️⃣ Water Treatment (RO + Mineralization) →
2️⃣ Ingredient Dissolution (Salts, Sugar, Acidulants) →
3️⃣ Homogenization / Mixing →
4️⃣ pH & Conductivity Adjustment →
5️⃣ Deaeration →
6️⃣ Pasteurization (HTST 72–78 °C / 15–30 s) →
7️⃣ Cooling (≤ 25 °C) →
8️⃣ Cold-Fill (Hygienic Zone) →
9️⃣ Capping & Nitrogen Flush →
🔟 Stability & Electrolyte Verification
Step 1. Water Treatment
Pilot Module
RO system plus a mineral dosing unit (Ca, Mg, K, Na).
Flow & Objective
Prepare base water with a conductivity of 0.5–1.0 mS/cm. Add minerals to build an isotonic profile (for example, Na⁺ 15–25 mg/100 mL and K⁺ 10–20 mg/100 mL).
Step 2. Ingredient Dissolution
Pilot Module
Heated blending tank with variable-speed agitation and a powder induction system.
Flow & Objective
Add salts, sugars, and acidulants in sequence (acid → salt → sugar → flavor), holding the batch at 40–50 °C to dissolve powders completely.
Adjust solids to Brix 4–8 °Bx and balance the acid-to-base ratio for a target pH of 3.3–3.8.
Step 3. Homogenization / Mixing
Pilot Module
High-shear mixer or inline static mixer.
Flow & Objective
Disperse functional ingredients (vitamins and flavors) evenly for a clear appearance, keeping mixer speed < 1,500 min⁻¹ to prevent foaming.
Step 4. pH & Conductivity Adjustment
Pilot Module
Inline pH and conductivity meter with dosing control.
Flow & Objective
Fine-tune the final pH to 3.3–3.8 to support microbial control and tartness, and confirm that osmolality sits within the isotonic range (270–330 mOsm/kg).
Step 5. Deaeration
Pilot Module
Vacuum deaerator (80–120 mbar) with an inline O₂ sensor.
Flow & Objective
Reduce dissolved oxygen to < 0.5 mg/L to protect vitamins and delicate flavors and improve stability after cold-filling.
Step 6. Pasteurization (HTST)
Pilot Module
Plate heat exchanger and holding tube with PU validation.
Flow & Objective
Run HTST pasteurization at 72–78 °C / 15–30 s to reduce total viable count (TVC) to < 10 CFU/mL while keeping the liquid clear, preserving fresh flavor, and avoiding salt precipitation.
Step 7. Cooling (≤ 25 °C)
Pilot Module
Plate cooler or chiller with N₂ headspace protection.
Flow & Objective
Cool the liquid below 25 °C to prevent bottle condensation in the cold-fill zone and limit volatile flavor loss.
Step 8. Cold-Fill (Hygienic Zone)
Pilot Module
Hygienic filler (Class 100/ISO 5 air) with bottle rinsing and a sterile filtration line.
Flow & Objective
Fill under positive pressure with filtered air while monitoring ambient air quality (< 10 CFU/m³).
Fill into HDPE or PET bottles, keeping headspace O₂ low (< 0.5 mg/L).
Step 9. Capping & Nitrogen Flush
Pilot Module
Capping unit with an N₂ injection system and torque monitor.
Flow & Objective
Flush the bottle headspace with N₂ to displace O₂ and protect vitamin C and colors from oxidation. Check cap application torque and seal integrity.
Step 10. Stability & Electrolyte Verification
Pilot Module
Stability chamber (25/37 °C), ion chromatography, and pH and conductivity meters.
Flow & Objective
Observe samples over 90–180 days for mineral precipitation, color fading, flavor oxidation, and shifts in ion levels (±5%).
Track pH drift (≤ 0.05) and confirm that the Na⁺/K⁺ ratio stays stable.
Pilot Targets & Notes
- pH 3.3–3.8 is an archived cold-fill trial range. The archive lists sorbate at 0.02–0.05% as a formulation example above pH 4.0. The preservation system and cold-fill process require product-specific validation.
- Osmolality 270–330 mOsm/kg defines a true isotonic profile.
- Avoid Ca²⁺ > 40 mg/100 mL to prevent carbonate salts from forming solids.
- Consider a trace addition of EDTA at 0.002–0.005% to help stabilize colors and vitamin C.
Vitamin / Adaptogen RTD (Aseptic) | Pilot-Scale Validation Guide
Overall Pilot Process Flow
1️⃣ Pre-Solubilization / Encapsulation of Actives →
2️⃣ Base Preparation (Water + Sweeteners + Acids) →
3️⃣ Blending & Homogenization →
4️⃣ Dissolved Oxygen Control →
5️⃣ UHT / HTST Low-PU Thermal Processing →
6️⃣ Aseptic Holding & Cooling →
7️⃣ Aseptic Filling →
8️⃣ Stability & Bioactivity Validation
Step 1. Pre-Solubilization / Encapsulation of Actives
Pilot Module
High-shear mixer, ultrasonic emulsifier, or encapsulation reactor (liposomal or polymer). An automatic water-bath blending vessel is an option for sample mixing.
Flow & Objective
Pre-dissolve vitamins, plant adaptogens, and polyphenols (such as ashwagandha, ginseng, and L-theanine) in a stabilizer or emulsifier matrix so they disperse evenly and tolerate heat better.
Step 2. Base Preparation (Water + Sweeteners + Acids)
Pilot Module
Heated blending tank (40–60 °C) with variable agitation and a powder induction system. An automatic water-bath blending vessel is an option for sample mixing.
Flow & Objective
Build an isotonic base with RO water, sweeteners (sucrose, sucralose, stevia), and acidifiers (citric, malic).
Adjust solids to Brix 4–7 °Bx and use the archived pH range of 3.0–3.6 to tune flavor for aseptic trials. Validate the aseptic process for the product and package.
Step 3. Blending & Homogenization
Pilot Module
Inline high-shear mixer or two-stage homogenizer (100/30 bar).
Flow & Objective
Blend the pre-solubilized actives into the base under shear to disperse them evenly. Keep the temperature at <50 °C to prevent vitamin breakdown.
Step 4. Dissolved Oxygen Control
Pilot Module
Vacuum deaerator (100–200 mbar) with an inline O₂ sensor and optional N₂ sparging.
Flow & Objective
Lower dissolved O₂ to <0.5 mg/L before heating to limit oxidation of vitamins (C and B complex) and adaptogenic compounds.
Step 5. Low-PU Thermal Processing
Pilot Module
Indirect tubular UHT (135–138 °C / 2–3 s) or HTST (85–90 °C / 20–40 s).
Flow & Objective
The archive lists PU ≤ 5–8 and >90% vitamin activity as pilot comparison targets. Measure nutrient retention and validate the aseptic process separately.
Choose the thermal route based on product pH and how well the active ingredients tolerate heat.
Step 6. Aseptic Holding & Cooling
Pilot Module
Aseptic surge tank (with N₂ headspace and jacket cooling).
Flow & Objective
Hold the product under sterile conditions and cool it quickly to ≤25 °C while preventing condensation and recontamination.
Step 7. Aseptic Filling
Pilot Module
ISO 5 aseptic filling cabinet, sterile filtration (0.2 µm), and an automatic sealing system.
Flow & Objective
Fill pre-sterilized PET or glass bottles under positive pressure and keep headspace O₂ at <0.5 mg/L.
Step 8. Stability & Bioactivity Validation
Pilot Module
Stability chamber (25 / 37 °C), HPLC (high-performance liquid chromatography, a lab method for measuring ingredients) or spectrophotometer to measure vitamin retention, and a sensory bench for flavor checks.
Flow & Objective
Test across 90–180 days for vitamin loss (<10%), adaptogen color drift (ΔE < 2.0), and microbial stability (no yeast or bacteria growth).
Pilot Targets & Notes
- pH 3.0–3.6 is an archived formulation range for aseptic trials. Validate the heat treatment and filling process for your specific product and package.
- PU ≤ 8 and >90% vitamin retention are archived trial targets. Measure how much of each vitamin remains in the finished drink.
- Use antioxidants (ascorbate, tocopherol) or chelators (EDTA 0.002–0.005%) to help stabilize active ingredients.
- For adaptogens (such as ginseng and Rhodiola), track bioactive markers (ginsenosides, rosavins) by HPLC.
Plant-Based Drink | Pilot-Scale Validation Guide
Overall Pilot Process Flow
1️⃣ Raw Material Pretreatment (washing / soaking / grinding) →
2️⃣ Slurry Adjustment (pH / enzymatic treatment*) →
3️⃣ Enzymatic Hydrolysis with Temperature Holding (for oats or cereals) →
4️⃣ Separation (decanter / centrifugation / filtration) →
5️⃣ Standardization (solids / fat / calcium salts / salt) →
6️⃣ Two-stage Homogenization →
7️⃣ Thermal Treatment Routes:
• UHT: 137–145 °C for 2–5 s (aseptic)
• HTST: 72–78 °C for 15–30 s (cold filling + cold chain) →
8️⃣ Aseptic Buffering & Cooling or Rapid Cooling →
9️⃣ Filling (aseptic or hygienic grade) →
🔟 Stability and Sensory Verification
Step 1. Raw Prep (Cleaning / Soak / Grind)
Pilot Module
Washer, soak tank (ambient–50 °C), and colloid or stone mill (0.2–0.5 mm gap).
Flow & Objective
Hydrate grains, nuts, or beans (0.5–12 h depending on the raw material), then wet-grind at a 1:5–1:10 water ratio to make an even slurry. Record initial °Bx, pH, and crude fiber and oil levels.
Step 2. Slurry Conditioning (pH / Enzymes / De-beany)
Pilot Module
Jacketed mix tank with pH control, an enzyme dosing pump, and a steam or hot-water loop.
Flow & Objective
Set pH to 6.0–7.0 (for oat or almond) or 6.6–7.2 (for soy). For oat bases, dose α-amylase and glucoamylase to control viscosity and release free sugars; for soy bases, apply short heating at 80–95 °C to reduce grassy notes and LOX activity.
Step 3. Thermal Enzyme Hold (Oat/Grain)
Pilot Module
Heated reactor with gentle agitation, held at 55–65 °C for 10–40 min.
Flow & Objective
Hold the slurry to reach the target viscosity (for example, 80–250 mPa·s @ 20 s⁻¹) and sweetness, then heat to 85–90 °C for 1–3 min to inactivate the enzymes.
Step 4. Separation (Decanter / Filtration)
Pilot Module
Decanter centrifuge or screw press → polishing through a 100–200 µm screen, then a 1–5 µm membrane (as needed).
Flow & Objective
Remove coarse fiber while keeping fine colloids that build mouthfeel. Set solids before homogenization to 1.2–2.5% (oat or almond) or 2.0–3.5% (soy).
Step 5. Standardization (Oil / Calcium / Salt / Flavor)
Pilot Module
Metering pumps for oil and mineral premix with an in-line blender.
Flow & Objective
Adjust fat to 0.5–3.0% (depending on product style), and add Ca salts (such as calcium carbonate or citrate to reach 100–200 mg Ca/240 mL), trace salt at 0.05–0.15%, and flavors. Check the buffering system so minerals do not precipitate when pH shifts.
Step 6. Homogenization (2-Stage)
Pilot Module
Two-stage homogenizer at 180–250/30–50 bar with a 55–70 °C feed temperature.
Flow & Objective
Form a stable emulsion of oil, protein, and polysaccharides. Aim for a particle size of D90 < 1–2 µm (D90 is the size below which ninety percent of the measured particle distribution falls) to slow creaming and sedimentation, and record the viscosity and shear profile.
Step 7. Thermal Route (Aseptic UHT or Cold-Fill HTST)
Pilot Module
UHT tubular (indirect) or DSI UHT (direct steam) system with a hold tube and PU logger.
HTST tubular (indirect) system with a diversion valve.
Optional scraped-surface heat exchanger for particulate or fibrous bases.
Flow & Objective
Aseptic: Run at 137–145 °C / 2–5 s, with pH typically at 6.6–7.0 (soy) or 6.2–6.8 (oat or almond), with the aim of limiting cooked flavors. Validate commercial sterility for the full process and package.
Cold-Fill: Run at 72–78 °C / 15–30 s → chill to ≤4 °C; this route requires cold-chain storage and distribution.
Step 8. Aseptic Holding & Cooling / Rapid Chill
Pilot Module
Aseptic surge tank (with N₂ headspace) + plate cooler, or a glycol chiller for the cold-fill route.
Flow & Objective
Cool quickly to ≤25 °C (aseptic) or ≤4 °C (cold-fill) to limit protein or particle clumping after heating, and monitor headspace O₂ against the < 0.5 mg/L target.
Step 9. Filling (Aseptic or Hygienic)
Pilot Module
ISO 5 aseptic cabinet (for PET, glass, or carton) or a hygienic cold-fill line with laminar airflow and bottle sterilization.
Flow & Objective
Aseptic: Fill sterile containers under positive pressure with automatic sealing.
Cold-fill: Limit O₂ pickup, verify cap torque, and chill packages immediately.
Step 10. Stability & Sensory Validation
Pilot Module
Stability chamber (25/37 °C), particle size analyzer, rheometer, centrifuge test (3,000 g/30 min), and colorimeter for ΔE.
Flow & Objective
Track samples over 90–180 d for phase separation, creaming index, viscosity drift (±10%), Ca-phosphate precipitation, and flavor oxidation. Run heat-shock cycling (30↔5 °C) and freeze-thaw tests (if required).
Pilot Targets & Notes
- Protein and oil balance drives texture and stability: higher protein adds body but can make the drink less stable during heating, so tune the formula with minimal levels of emulsifiers (lecithin) and hydrocolloids (gellan or CMC).
- Mineral fortification (Ca/Fe/Zn) can shift pH and ionic strength; buffer with citrate or phosphate salts and test ahead of time for precipitation.
- Complete enzyme inactivation is critical for oat bases, because leftover amylase will keep thinning the drink in the package.
- Low-oxygen handling after UHT helps keep flavor fresh; consider N₂ blanketing.
Quick Matrix — Which Categories Need What?
- Water:Water Treatment ✓ / Gravity/Isobaric Filler ✓ / Label-Pack / Cooling (sparkling) ✓
- Carbonated:Mixing ✓ / Carbonation ✓ / Isobaric Filler ✓ / Cooling ✓ / Seamer-Torque ✓
- Juice:Mixing ✓ / 2-stage Homogenizer ✓ / Pasteurization ✓ / (Aseptic) Filler ✓ / Deaeration ✓
- Tea:Brew ✓ / 2-stage Homogenizer ✓ / Pasteurization ✓ / Hot-fill or Aseptic ✓ / Cooling ✓
- Dairy/Plant-based:2-stage Homogenizer ✓ / UHT/DSI ✓ / Aseptic Filler ✓ / Steam ✓ / CIP/SIP ✓
- Functional:Precise Dosing ✓ / Low-PU Thermal or Cold-fill ✓ / O₂ control ✓
- Fermented:Fermenter ✓ / Isobaric Filler ✓ / Pasteurizer (optional) ✓
- Special:High-shear ✓ / 2-stage Homogenizer ✓ / UHT/Hot-fill ✓ / Particle Filler ✓
Typical R&D Setups & Equipment Maps
Setup A: Still Juice / Functional Drink (Non-carbonated)
Flow: Preparation → Sample mixing & dissolving → Inline vacuum deaeration → Inline lab homogenization (Upstream) → pilot HTST/UHT → cooling → Inline lab homogenization (Downstream) → cooling → aseptic filling → stability tests.
Key modules: Lab high-shear mixer, Inline Lab Homogenizer, Lab/Pilot HTST/UHT (tubular/plate/DSI), Inline Vacuum Deaerator, Inline Lab Aseptic Filling Cabinet.
Setup B: Carbonated Soft Drink / Sparkling Tea
Flow: water polishing → syrup preparation → blending → chilling → pilot carbonator-filler (isobaric) → seam/cap checks → O₂/CO₂ verification → cold-chain label tests.
Key modules: Mixing tanks, inline mixers, Pilot Carbonator-Filler (isobaric), chiller, seam/torque QA set.
Setup C: Dairy / Plant-Based (Protein Systems)
Flow: soaking/grinding (plant) or chilled raw milk intake → thermal pre-treatment → Inline 2-stage homogenization → UHT (e.g., 140–152 °C) → rapid cooling → aseptic filling → sensory & shelf-life testing.
Key modules: Soaking & grinder set, 2-stage homogenizer, UHT with hold-tube (and optional DSI), Aseptic Filler, CIP/SIP set.
Cross-Type QA & Utilities
Dissolved oxygen (DO) targets by drink type: still ≤1.5 mg/L; carbonated ≤0.5 mg/L; premium waters ≤0.2 mg/L.
Cleaning and sterilizing checks (CIP/SIP): flow velocity ≥1.5 m/s; SIP ≥121 °C / ≥20 min (typical).
Trial records: PLC trends (temperature, pressure, and flow), batch records, PU/F-value logs, CO₂/O₂ logs, and cap torque or can seam reports.
Equipment by test step
| Stage | Primary Goal | Equipment |
|---|---|---|
| Bench mix | Solids dissolution & dispersion | Water bath Blending Mixer/ Fermenter |
| Texture | Particle size & mouthfeel | Inline Lab Homogenizer |
| Thermal | Safety & quality window | Lab/Pilot HTST/UHT Plant (tubular/plate/DSI) |
| Oxygen | Flavor & color retention | Inline Vacuum Deaerator |
| Package | Sterility & integrity | Lab Aseptic Filling Cabinet / Isobaric filler |
| Sparkle | CO₂ control | Pilot Carbonator-Filler/ Pilot Aseptic Carbonator |
FAQS
How many pilot runs before moving to production?
Teams typically run 3–5 trials. Early runs compare settings and a follow-up run checks the chosen settings. The trials also cover packaging validation and the start of shelf-life testing.
Can one pilot line handle different drinks?
Yes. pilot lines are modular, so the equipment can be arranged for juice, milk, other dairy drinks, plant-based drinks, or sparkling drinks. Options include inline homogenization before heating, after heating, or both, plus UHT/HTST, deaeration, aseptic filling, and carbonation.
How much can the line process, and what does it need to run?
Lab scale: 5–40 L/h (rated flow: 20L/H); Pilot scale: 60–120 L/h (rated flow: 100L/H), and custom capacities are available. Utilities include steam, chilled water, compressed air, and electricity. Exact site requirements depend on the equipment selected.
What helps limit a cooked taste?
A pilot run can compare DSI or lower-PU UHT settings with rapid cooling and control of dissolved O₂ before heating. Flavor checks on the finished samples show how each setting tastes.